

So it begins....
I have found others who have done this setup but I cant seem to find their threads anymore for info on how to do this while I did mine. so I had to do this twice! to get it perfected.
I did not take thousands of photos but I will lay out a step by step.
Items Required-
-4(two pairs) of morimoto D2s square projectors.
-4(two pairs) of D2s morimoto 50 or 35watt ballasts and bulbs corresponding with you color desire.
-4(two pairs) of square projector shrouds (can be bundle bought with projectors)
-set of chevy Silverado headlights from ebay or craigslist or use your own (i do not suggest)
(the projectors, ballasts, bulbs, and shrouds can all be bought in a packaged deal)
TWO kits required for this - Bi-xenon Morimoto Mini Stage III Kit (D2S)
Tools-
Screwdrivers of all times
10mm socket and ratchet
safety knife
Drill
heat gun (home depot has these OR you can bake your headlight each option has its ups and downs.)
dermal with plastic blades
needle nose pliers
any type of good glue (don't recommend gorilla glue to messy)
patients
I'm not going to get into the wiring for the headlights but you WILL have to add a 4 relays (2 pairs) to power these ballasts. I do not recommend anyone to hook these up directly to the truck because they require about 10 amps more then the lines supply.
basically you are going to have to run all new wiring to the headlights which would require a whole new thread to explain.
I will include pictures of how I set my truck up for all my additional power needs.
Steps-
first time around it took me about 10 hours to do this.
So if you have bought a ebay headlight you ready to go if not scroll down to step 4.
1.) open your hood and get a flat head screw driver and a 10mm socket and ratchet and start disassembling the plastic radiator cover.
2.) once off the grill is next it has 4 10mm bolts on top then take a needle nose plier and reach now and pinch all the clips and take the grill off
3.) the headlights are next 3 bolts hold them in each. one is behind the headlight and you must take the inner wheel well off and reach your had in there and unbolt it just enough to pull the headlight out..
****the headlight requires a unique way to get it out please watch this video (this video also explains all of the first three steps!)
****
4.) This is where your path will also Y but the same steps apply for each. so you will either bake the headlight open ( at 250 for about 8 minutes) or use a heat gun and work your way around the headlight. if you go with baking you might need a friend to help you pry the headlight open because when you bake you take it right out of the oven and use your hands to pull it open. if not bake then heat gun is being use and while using a screwdriver to open the headlight be careful because the plastic is very soft on these headlights when heated up so be careful or you can quickly ruin the shell of the headlight.
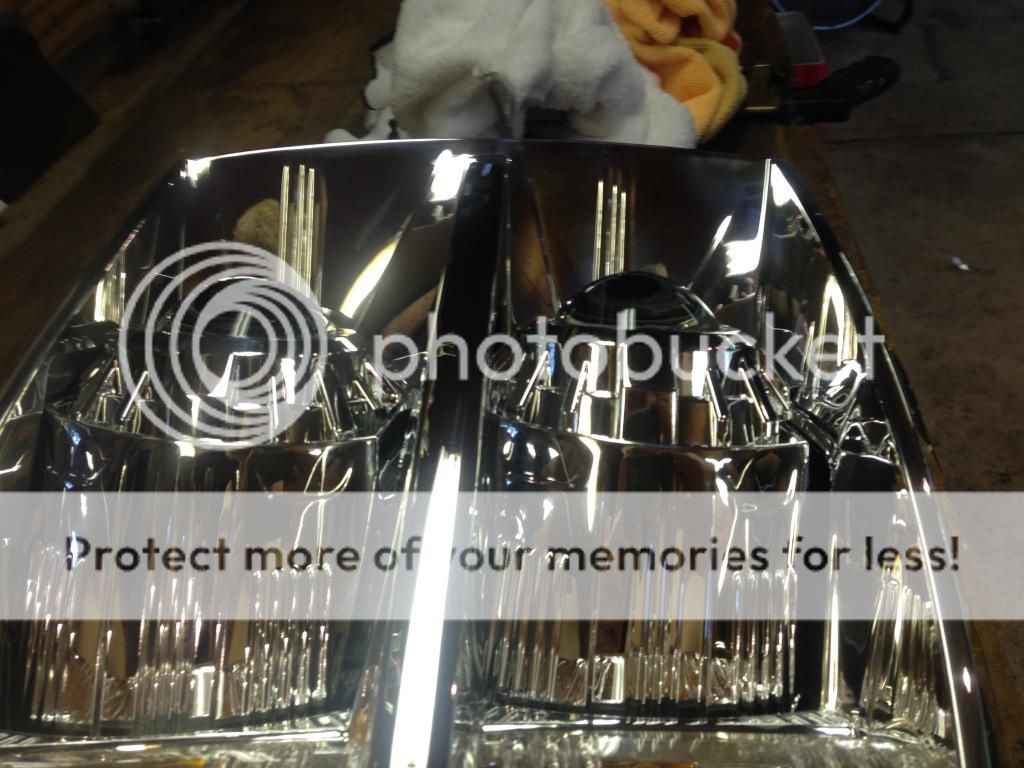
5.) After you have the headlight open and have struggled for hours now you must take the chrome out too which is simple but be careful when pulling out as to not break it. once the outer bigger piece is out you must now pull the reflector bowls out too.
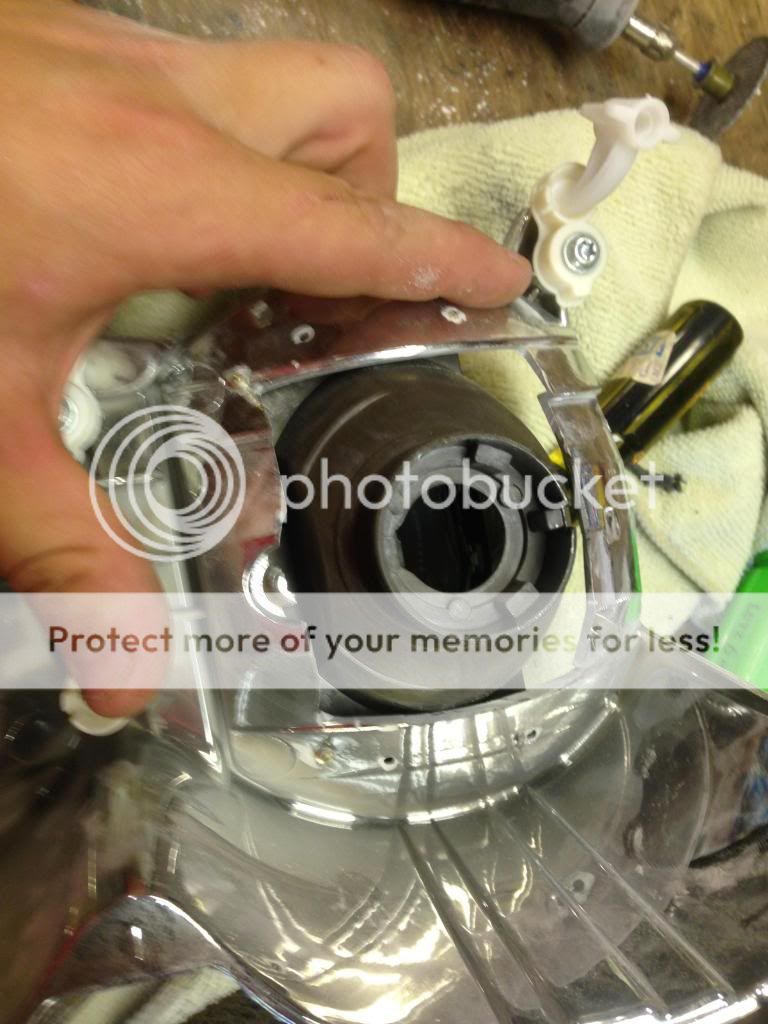
6.) after you have done that you headlight should look like this
Next you must cut out where the projector is going in the Stock headlight reflector bowl
7.) then prefit the projector in the hole (some trimming may be needed)
![Image]()
![Image]()
![Image]()
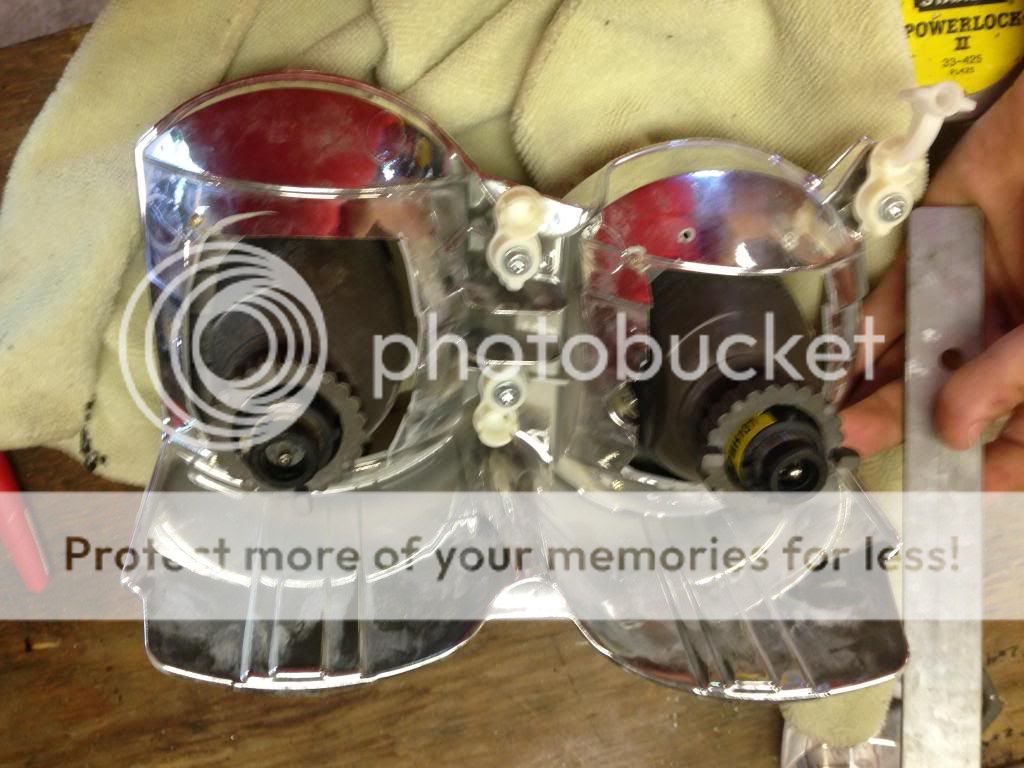
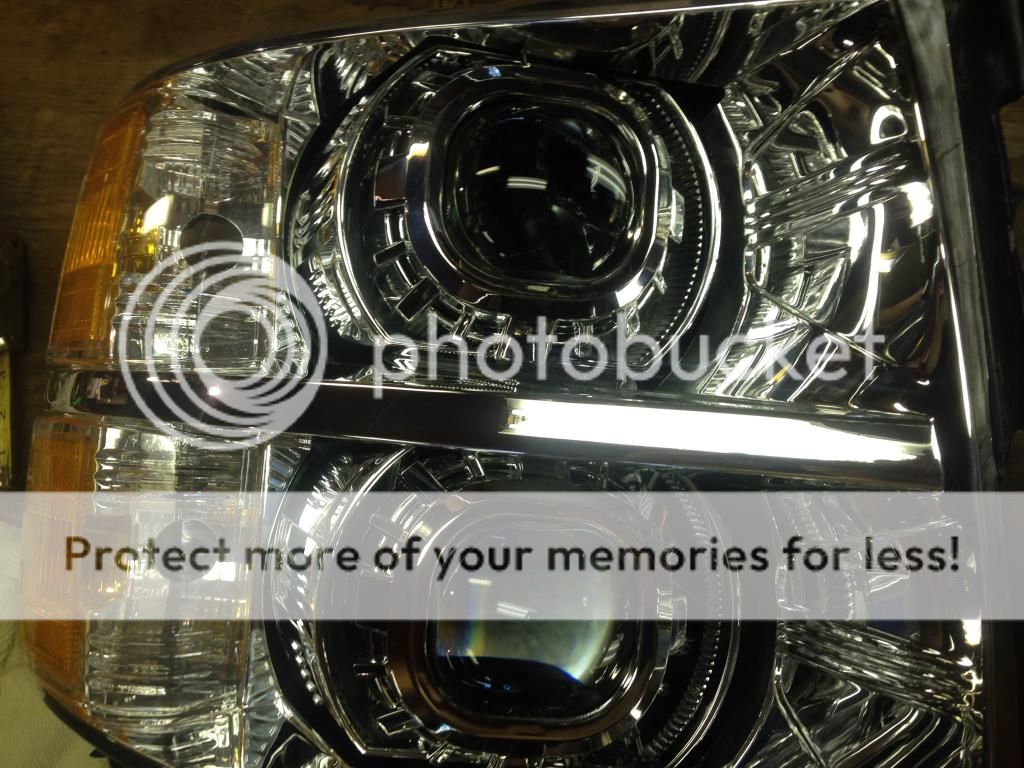
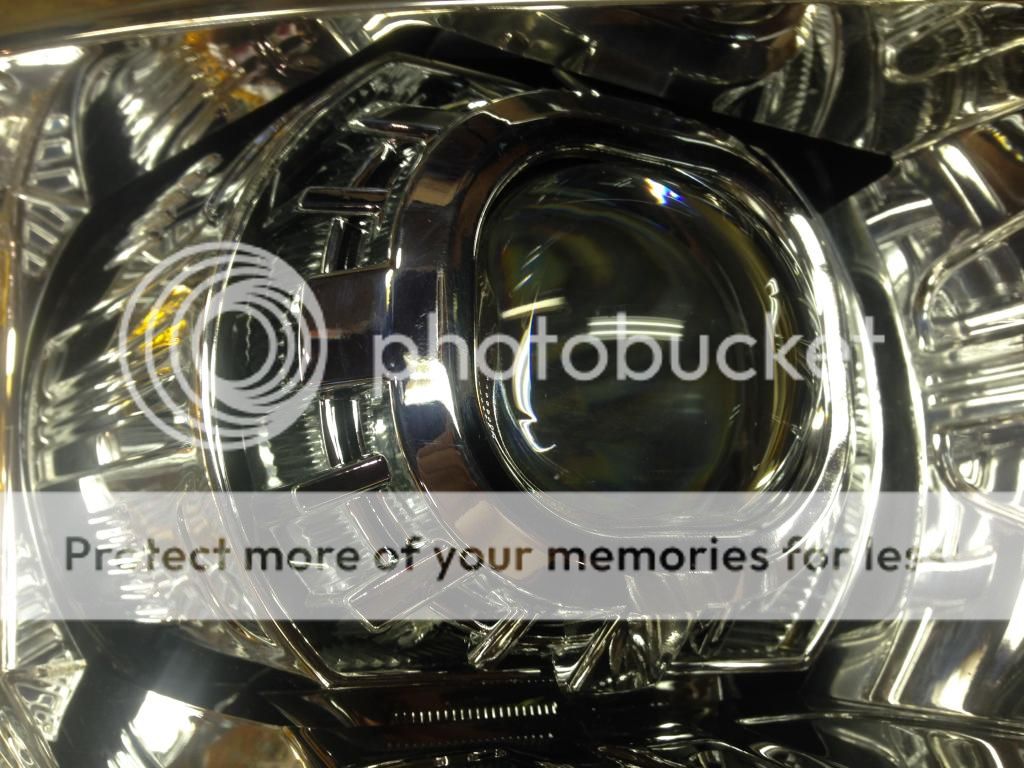
8.) Next once both holes are cut and the projectors fit in the respected holes you must now install the projector
9.) take the headlight and install the stock reflector bowl back onto the black housing. next install the back of the housing and the stock reflector bowls onto the truck.
10.) this part you must center the projector and aim it accordingly to it being level and in the center on the reflector bowl as much as possible. then mark the holes and screw the projector into place ( later on you will have to find a epoxy or j b weld to hold it all in place.)
11.) now move on to the next projector. find a friend to help or if you are clever you can do it yourself. hold the second projector into place and get it level and in the center as much as possible and measure the center of the lenses to the other center off the lens. i got 5 1/2 for me yours might be different.
( to add. mount the projector with 2 screws to get the projector level. install a third screw not drilled into the stock reflector blow. this screw with be used to adjust height the get the lights perfectly straight )
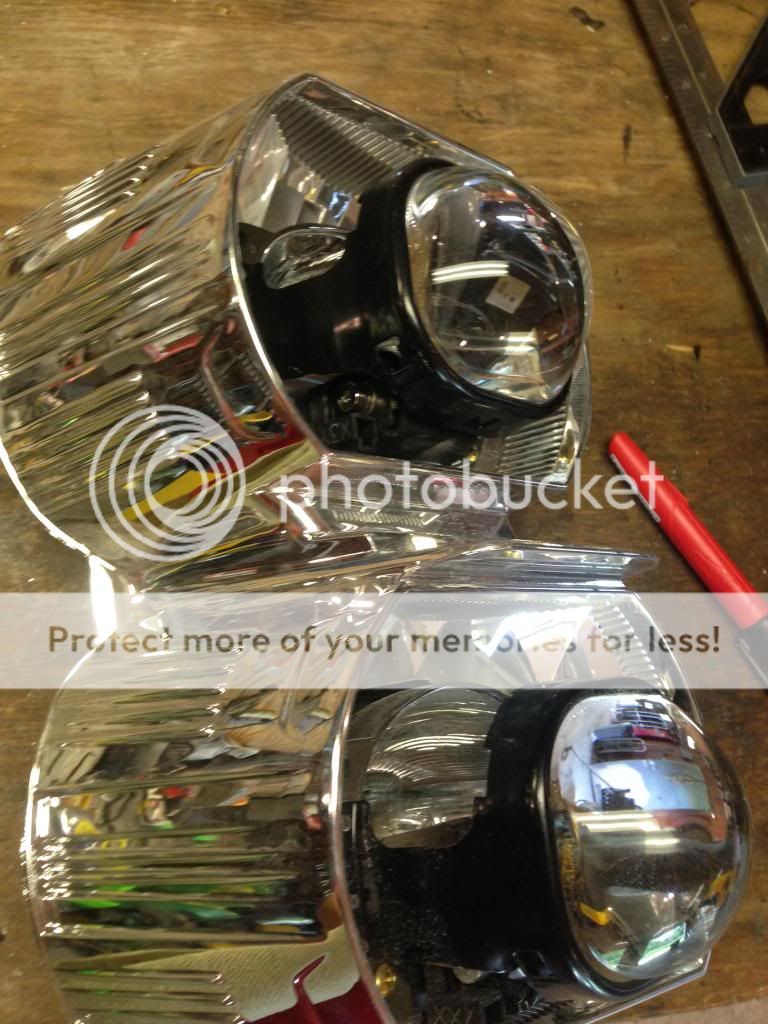
12.) take that measurement and start up (with ballast and bulb) the projector that's already mounted shot it onto a wall (in the truck) and mark whatever your measurement ( up or down depending on which projector you did first )
13.) then mount the second projector accordingly and aimed at that line.
![Image]()
![Image]()
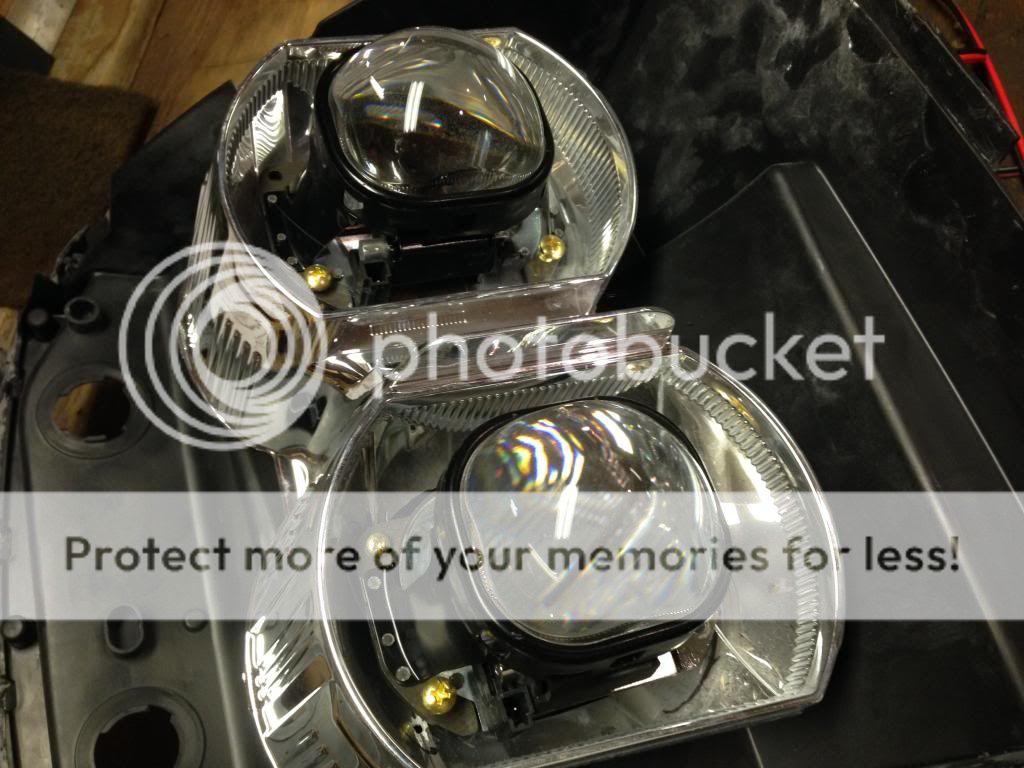
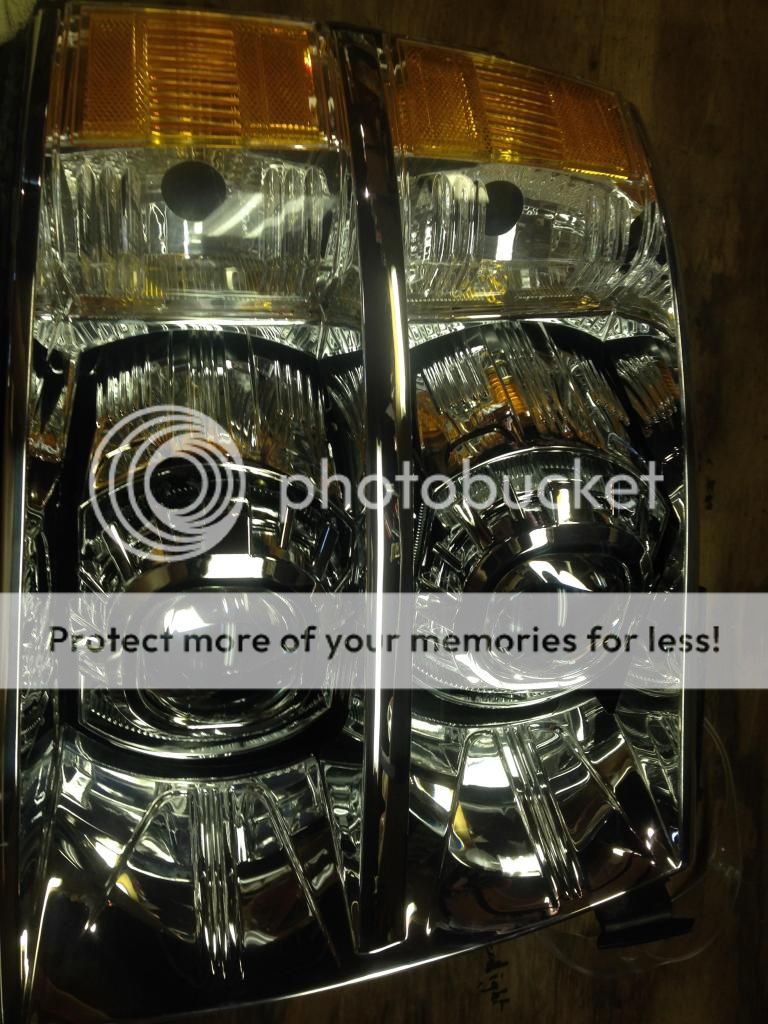
14.) next you will have to cut the shroud to fit into the reflector bowl each shroud will need to be trimmed to your uniqueness so there is not way to quide you on this. (easier said then done this will take awhile) remember you can always cut more off but you cant put it back.
15.) next after cutting the shroud to fit. you will need to epoxy/glue the projector in place (mostly support). don't forget to glue the shroud
16.) i would wait a couple days for all the glue to dry before installing.
![Image]()
![Image]()
![Image]()
![Image]()
:gearjamin
I have found others who have done this setup but I cant seem to find their threads anymore for info on how to do this while I did mine. so I had to do this twice! to get it perfected.
I did not take thousands of photos but I will lay out a step by step.
Items Required-
-4(two pairs) of morimoto D2s square projectors.
-4(two pairs) of D2s morimoto 50 or 35watt ballasts and bulbs corresponding with you color desire.
-4(two pairs) of square projector shrouds (can be bundle bought with projectors)
-set of chevy Silverado headlights from ebay or craigslist or use your own (i do not suggest)
(the projectors, ballasts, bulbs, and shrouds can all be bought in a packaged deal)
TWO kits required for this - Bi-xenon Morimoto Mini Stage III Kit (D2S)
Tools-
Screwdrivers of all times
10mm socket and ratchet
safety knife
Drill
heat gun (home depot has these OR you can bake your headlight each option has its ups and downs.)
dermal with plastic blades
needle nose pliers
any type of good glue (don't recommend gorilla glue to messy)
patients
I'm not going to get into the wiring for the headlights but you WILL have to add a 4 relays (2 pairs) to power these ballasts. I do not recommend anyone to hook these up directly to the truck because they require about 10 amps more then the lines supply.
basically you are going to have to run all new wiring to the headlights which would require a whole new thread to explain.
I will include pictures of how I set my truck up for all my additional power needs.
Steps-
first time around it took me about 10 hours to do this.
So if you have bought a ebay headlight you ready to go if not scroll down to step 4.
1.) open your hood and get a flat head screw driver and a 10mm socket and ratchet and start disassembling the plastic radiator cover.
2.) once off the grill is next it has 4 10mm bolts on top then take a needle nose plier and reach now and pinch all the clips and take the grill off
3.) the headlights are next 3 bolts hold them in each. one is behind the headlight and you must take the inner wheel well off and reach your had in there and unbolt it just enough to pull the headlight out..
****the headlight requires a unique way to get it out please watch this video (this video also explains all of the first three steps!)
4.) This is where your path will also Y but the same steps apply for each. so you will either bake the headlight open ( at 250 for about 8 minutes) or use a heat gun and work your way around the headlight. if you go with baking you might need a friend to help you pry the headlight open because when you bake you take it right out of the oven and use your hands to pull it open. if not bake then heat gun is being use and while using a screwdriver to open the headlight be careful because the plastic is very soft on these headlights when heated up so be careful or you can quickly ruin the shell of the headlight.
5.) After you have the headlight open and have struggled for hours now you must take the chrome out too which is simple but be careful when pulling out as to not break it. once the outer bigger piece is out you must now pull the reflector bowls out too.
6.) after you have done that you headlight should look like this
Next you must cut out where the projector is going in the Stock headlight reflector bowl
7.) then prefit the projector in the hole (some trimming may be needed)
8.) Next once both holes are cut and the projectors fit in the respected holes you must now install the projector
9.) take the headlight and install the stock reflector bowl back onto the black housing. next install the back of the housing and the stock reflector bowls onto the truck.
10.) this part you must center the projector and aim it accordingly to it being level and in the center on the reflector bowl as much as possible. then mark the holes and screw the projector into place ( later on you will have to find a epoxy or j b weld to hold it all in place.)
11.) now move on to the next projector. find a friend to help or if you are clever you can do it yourself. hold the second projector into place and get it level and in the center as much as possible and measure the center of the lenses to the other center off the lens. i got 5 1/2 for me yours might be different.
( to add. mount the projector with 2 screws to get the projector level. install a third screw not drilled into the stock reflector blow. this screw with be used to adjust height the get the lights perfectly straight )
12.) take that measurement and start up (with ballast and bulb) the projector that's already mounted shot it onto a wall (in the truck) and mark whatever your measurement ( up or down depending on which projector you did first )
13.) then mount the second projector accordingly and aimed at that line.

14.) next you will have to cut the shroud to fit into the reflector bowl each shroud will need to be trimmed to your uniqueness so there is not way to quide you on this. (easier said then done this will take awhile) remember you can always cut more off but you cant put it back.
15.) next after cutting the shroud to fit. you will need to epoxy/glue the projector in place (mostly support). don't forget to glue the shroud
16.) i would wait a couple days for all the glue to dry before installing.
:gearjamin


