This includes a bunch of other stuff, but it shows a visual of why viper8315 is warning about turning the bowl and filter upside down before pulling out the filter.

gm-techlink.com
Inspecting the Diesel Fuel System for Contamination
October 31, 2019
Water and other contaminates in diesel fuel will create drivability concerns and a loss of engine power. If water and/or debris is present in the fuel system, the fuel cannot cool and lubricate the components properly, which may lead to overheating, rust, corrosion and, ultimately, component failure. Water and debris can enter the fuel system in several ways, either through a contaminated refueling source, plugged venting or through long-term condensation in the fuel tanks of the vehicle.
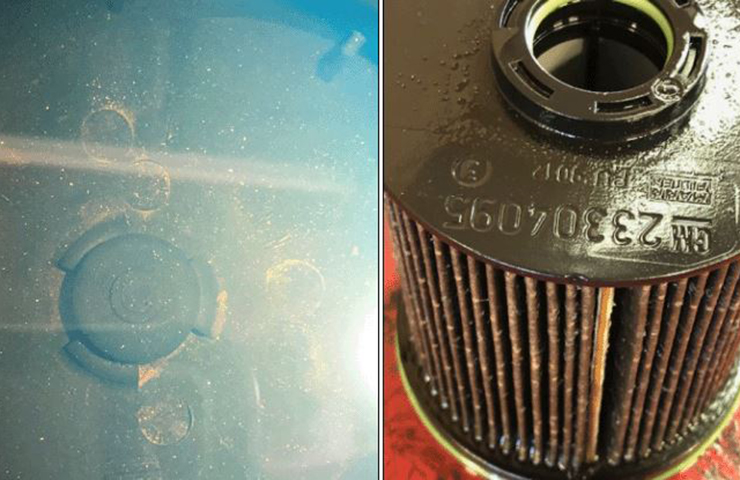
If fuel system contamination is present on 2017-2020 Silverado 2500/3500, Sierra 2500/3500; 2019-2020 Silverado 4500HD/5500HD/6500HD; and 2020 Silverado 1500 and Sierra 1500 models equipped with the 6.6L V8 Duramax diesel engine (RPO L5P, L5D) or 3.0L I6 Duramax diesel engine (RPO LM2), diagnostics will often lead to removing the fuel/water filter to inspect for contamination. (Fig. 8) In these cases, use care when removing the fuel/water filter and do not reinstall the fuel/water filter into the housing until the fuel/water separator reservoir has been cleaned.
Fig. 8
If the fuel/water filter is removed from the fuel/water separator reservoir incorrectly, any debris in the fuel may fall into the reservoir and get pumped back into the fuel system, leading to the same engine performance concerns.
TIP: Do not replace any fuel system components if contamination has been found. Flush the fuel system first. Once the system has been flushed, continue with the diagnostics in the appropriate Service Information.
Fuel/Water Filter Operation
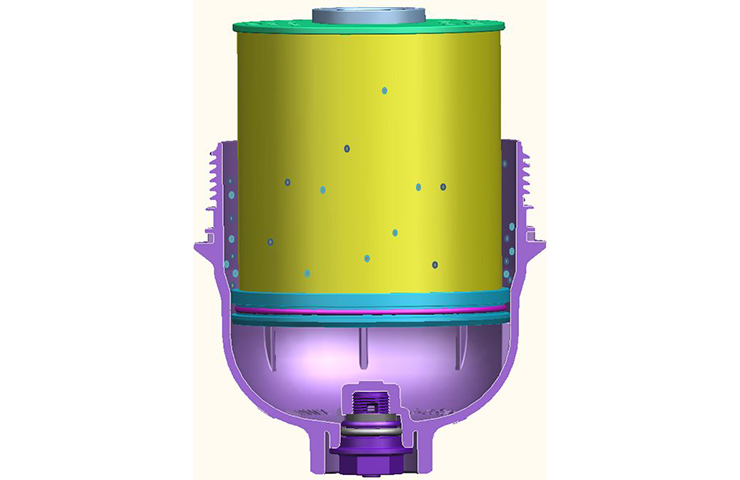
The fuel/water filter assembly consists of a fuel filter/water separator, fuel heater, fuel temperature sensor, and a water in fuel sensor. The filter (Fig 9, #3) is designed to remove water as well as any particles/debris from the fuel system.
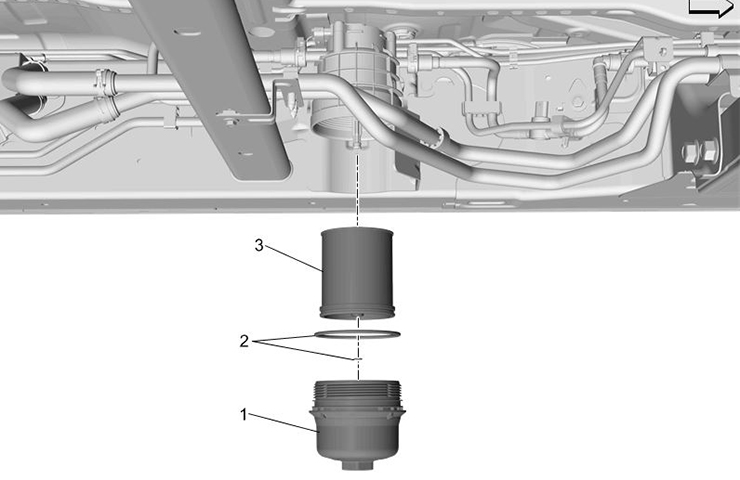 Fig. 9
When fuel/water enters the filter, it travels through the paper filter element (Fig. 10, A), which traps particles/debris that were in the fuel that may damage the fuel injection system. Any trapped particles should remain on the outside of the filter. The fuel then travels through the water separator (Fig. 10, B), which pulls the water out. The water collects in the bottom of the fuel/water separator reservoir (Fig. 10, C). There is a drain in the reservoir. The filtered fuel is returned to the fuel system.
Fig. 10
If a new filter is installed without cleaning the fuel/water separator reservoir, any debris that may be in the reservoir may limit the performance of the filter and water separator as well as lead to contaminated fuel re-entering the fuel injection system.
Fuel/Water Filter Removal
The fuel/water filter must be removed correctly to prevent debris from entering the fuel/water separator reservoir.
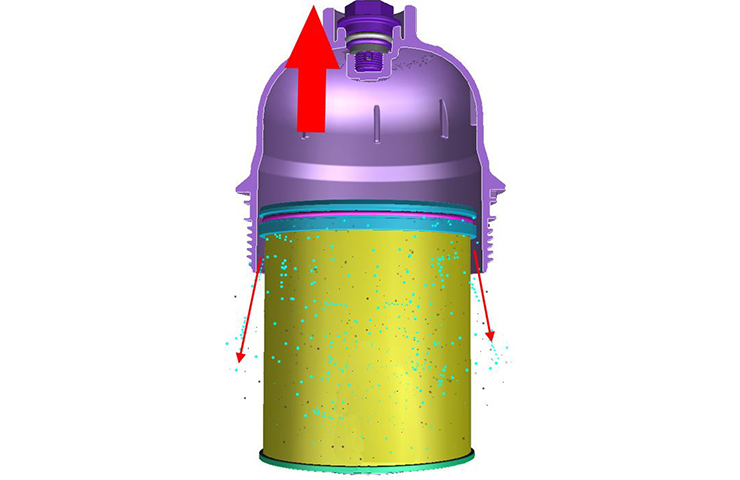
When removing the filter from the housing, use care to not separate the filter from the fuel/water separator reservoir. (Fig. 11)
Fig. 11
To separate the filter from the fuel/water separator reservoir, place the filter downward in a clean, dry drain pan and pull the filter down. (Fig. 12)
Fig. 12
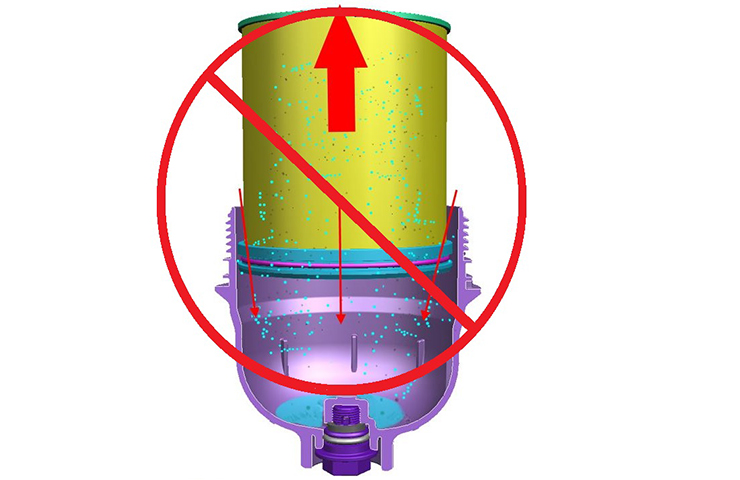
If the filter is facing upward, any debris left on the sides of the filter may escape past the O-ring seal during removal and settle in the fuel/water separator reservoir. (Fig. 13) Once reinstalled to the housing, the water/debris left in the water/fuel separator reservoir will flow past the filter and directly in to the fuel injection system when the engine is started.
Fig. 13
Inspect the fuel/water separator reservoir and the filter for heavy debris. If heavy debris is found in the filter, clean the fuel/water separator reservoir and continue with the fuel system flushing procedure.
If no signs of debris are found, clean the fuel/water separator reservoir, install a new filter and refer to the appropriate Service Information to continue diagnosis.
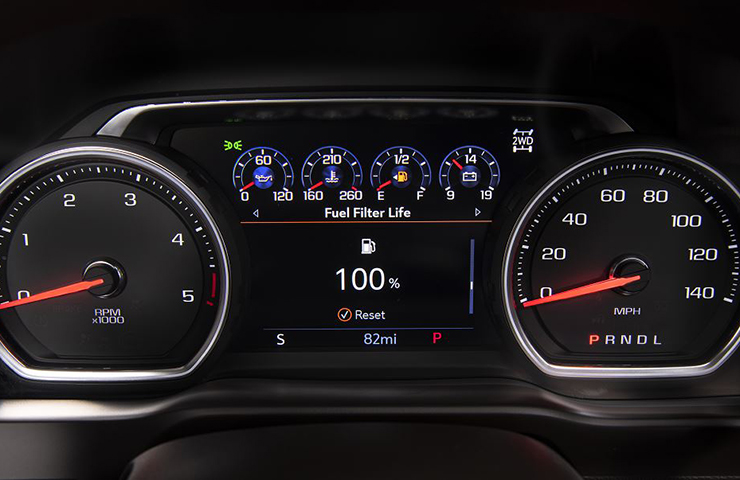
TIP: Some models may have a fuel filter life monitor. Reset the system after installing a new filter using a scan tool or the Driver Information Center controls in the vehicle. (Fig. 14)
Fig. 14
Fuel System Flushing
With the fuel filter installed, disconnect the chassis-side fuel feed hose from the engine-side fuel feed pipe and place the end of the chassis-side fuel feed hose into a clean container. Run the fuel pump to clean any debris left in the fuel lines. Also clean the fuel/water separator reservoir and install a new fuel filter.
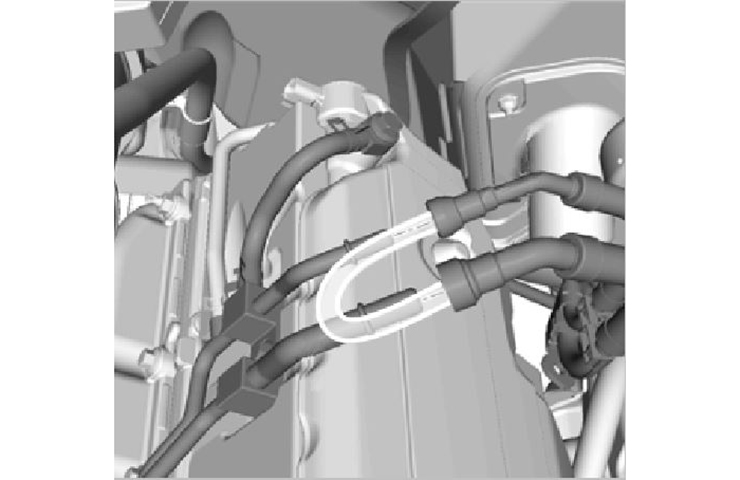
Next, disconnect the chassis-side fuel return hose from the engine-side return pipe. Install a clear line between the fuel supply hose and the fuel return hose and run the fuel pump until the fuel runs clear in the line. (Fig. 15)
Fig. 15
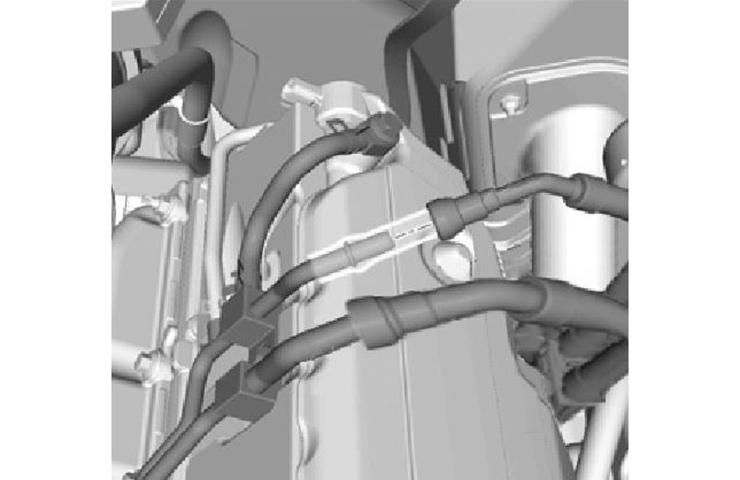
Reconnect the chassis-side fuel feed hose to the engine-side fuel feed pipe. Connect a clear line in series at the fuel return hose to the engine return pipe and run the fuel pump until the fuel runs clear in the line. (Fig. 16) Reconnect all fuel lines and test for any DTCs or any fuel symptoms.
Fig. 16
For additional information, refer to the latest version of Bulletin #18-NA-361.