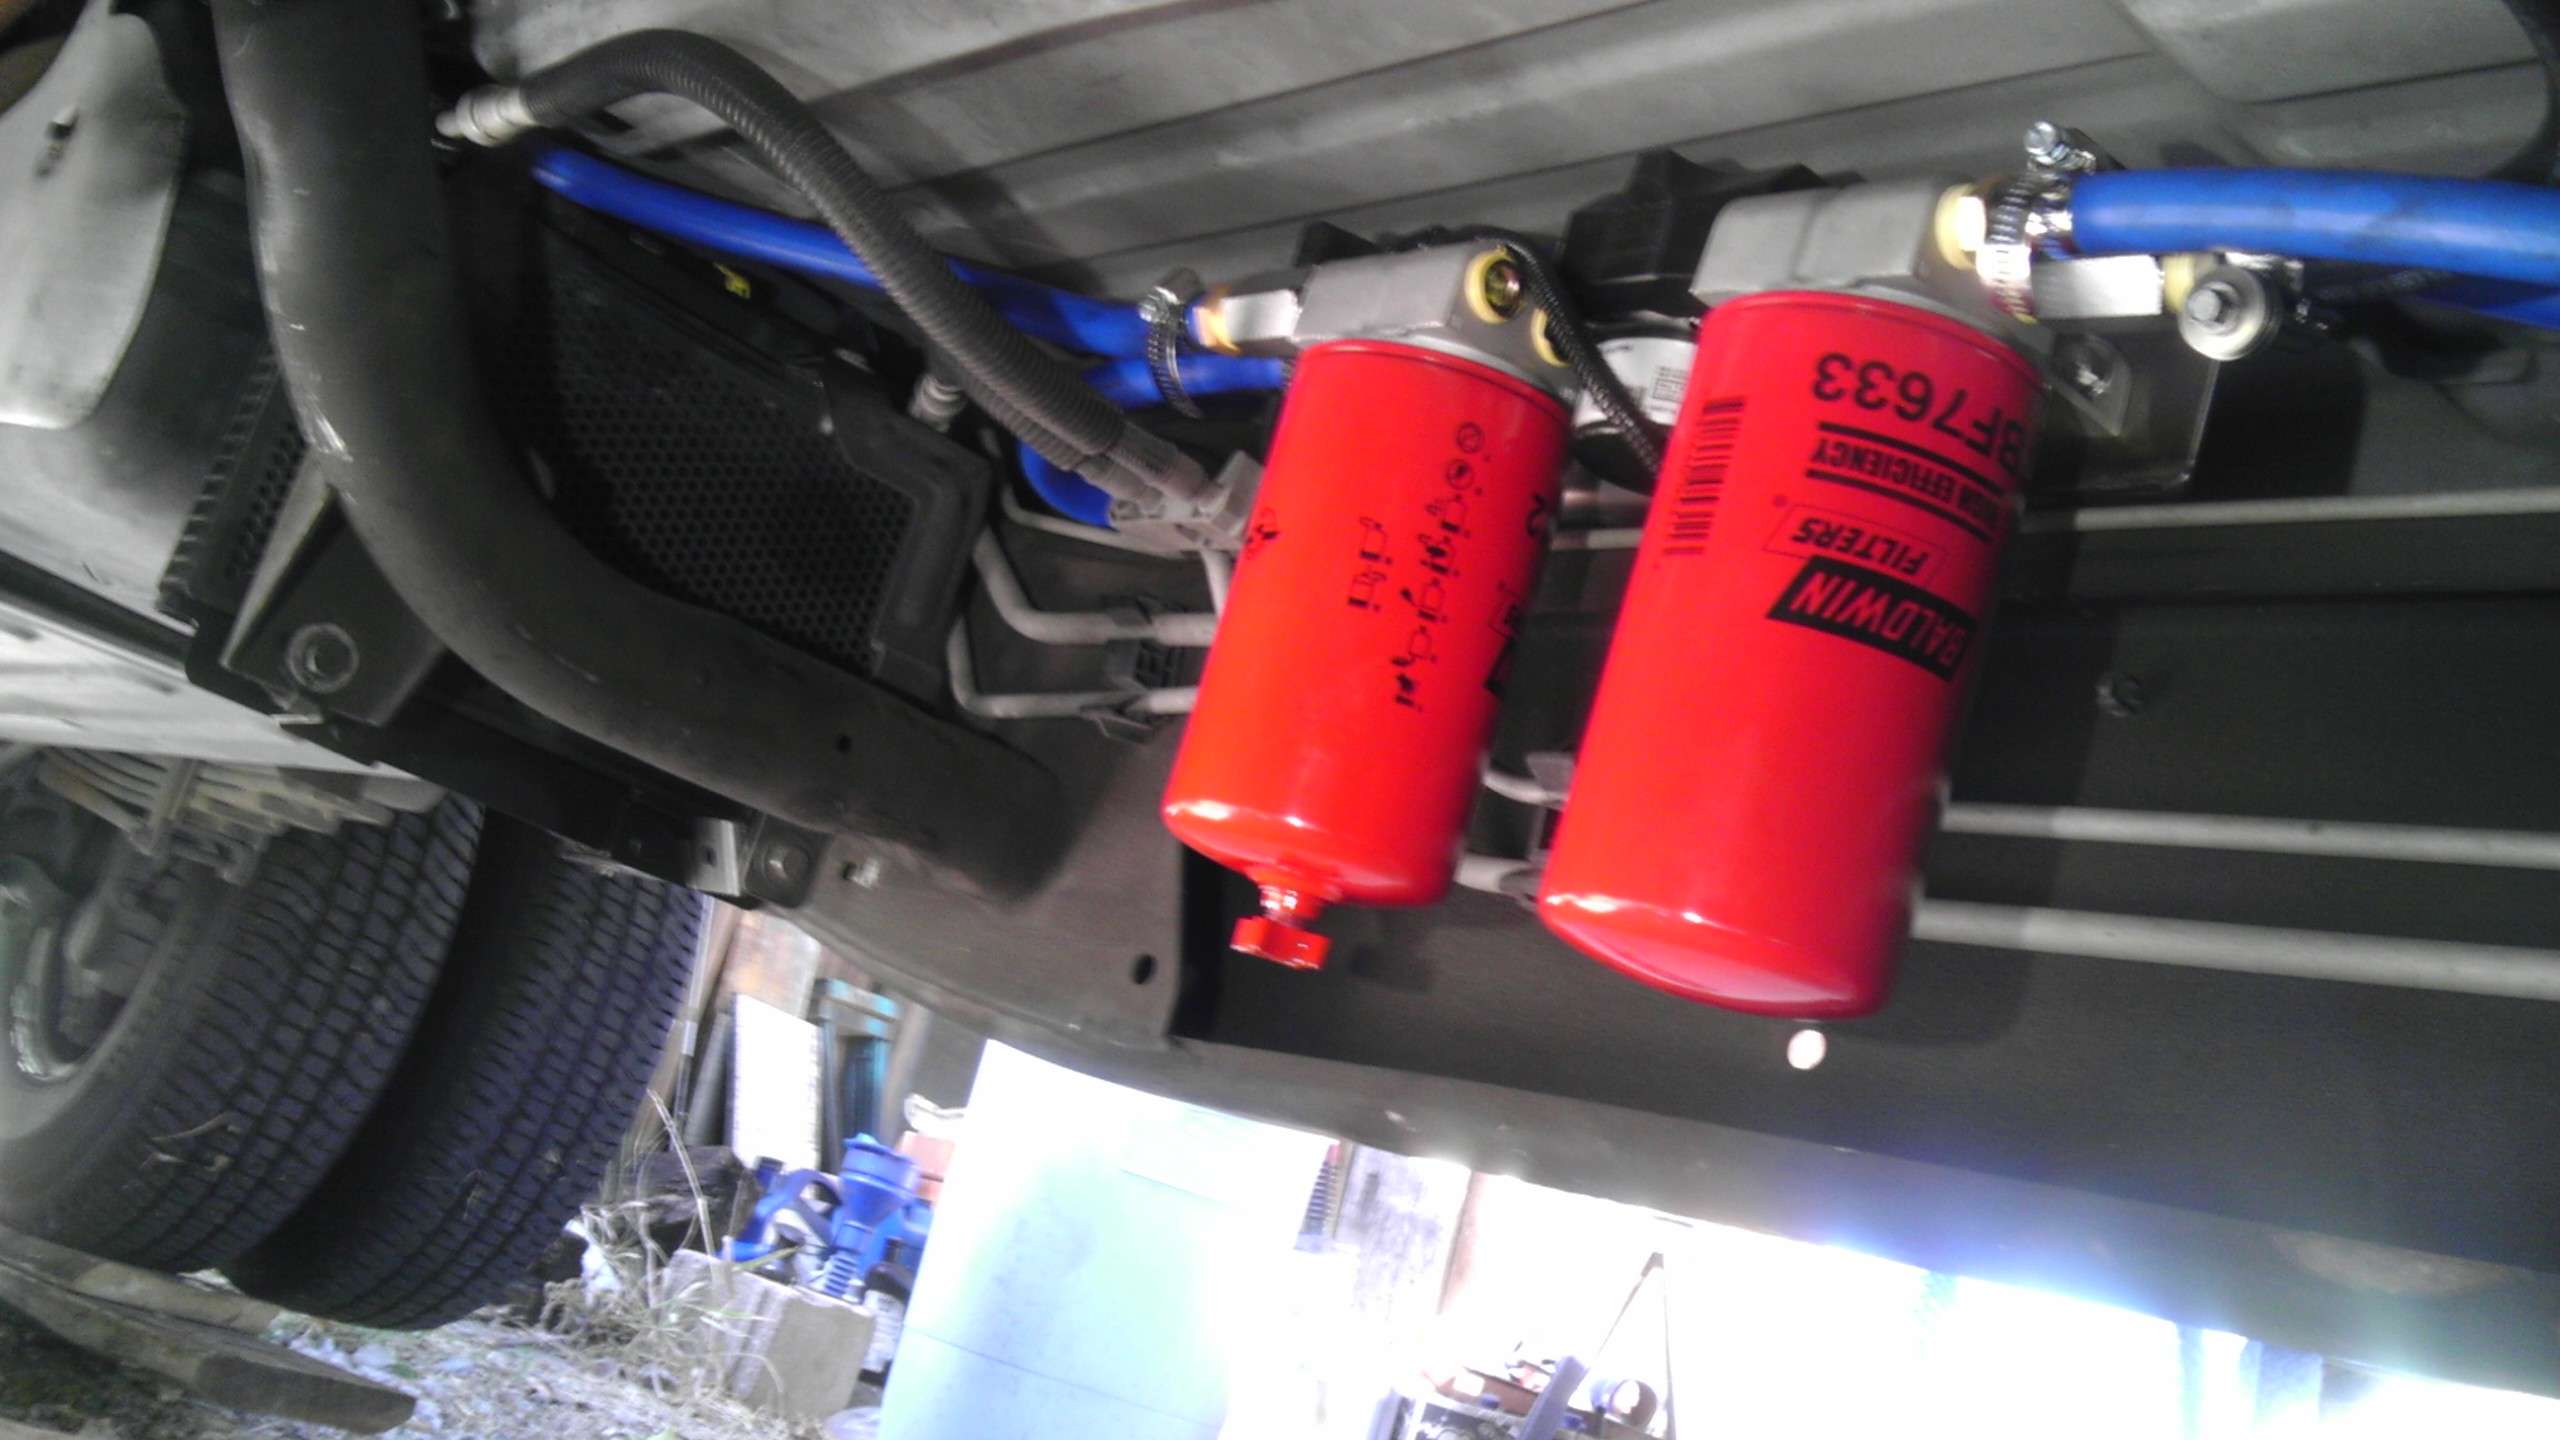
This is a simple LP/aux Filtration assembly that I put together for an LBZ CC DRW….long & big hipped girl, but the mounting should work on the shorter HDs too.
With this setup, I’m adding two aux filters, leaving the tertiary OEM mount up front, but you can easily scale it down to 1-aux FWS filter (BF-1212) and use your OEM filter head as the new Secondary fine particulate filter (using either the acDelco TP3018, or the Racor PFF50216 or the Baldwin BF46062).
You’ll have an easy access water drain valve and the best in fine particulate filtering up front.
Parts Goodies Used:
1- Kennedy single pump Deluxe Kit
2 – Hastings KF-33 aux filter head bases,
(also repackaged under either the Wix 24770 or the Napa 4770)
plus
1 – Baldwin BF1212 fws filter &
1 – Baldwin BF7633 filter
2 - MV08FM ½” mini-ball valves
4 – Brass ½” hose barbs
5 – Feet bulk ½” bio compatible fuel hose
(I used Aeroquip # FC332-08)
1 – Roll ‘Yellow’ (fuel compatible) plumbers tape
The Deluxe Kit comes with all the extras you see here;
![Image]()
On the left are the underhood power/fuse tap harness (pink/blue wires) and the Relay.
On the right is the LP harness,
The quick-connect water resistant plug tap (in plastic bag) for the LP wires,
And the oil PSI switch (green cap)with a ½” to ¼” brass bushing .
Center, two plastic quick-connect barbed fittings and two heavy duty hose clamps.
Not pictured but included, two ‘clampless’ ½” hose barbs, ‘bout 4-5’ of ½” fuel line.
The mounting plate for the LP is a nice Stainless Steel saddle style that sits on the frame rail top and secures thru an existing whole in the frame with a single SS bolt/lock nut (3 holes to choose from) to secure. It comes milled with 2 mounting slots, ready for the twin pump kit, but also works well for a single pump and a single aux filter head.
I modified it and added a 3rd position for a 2nd filter, and two drilled holes for the 1st filter head.
![Image]()
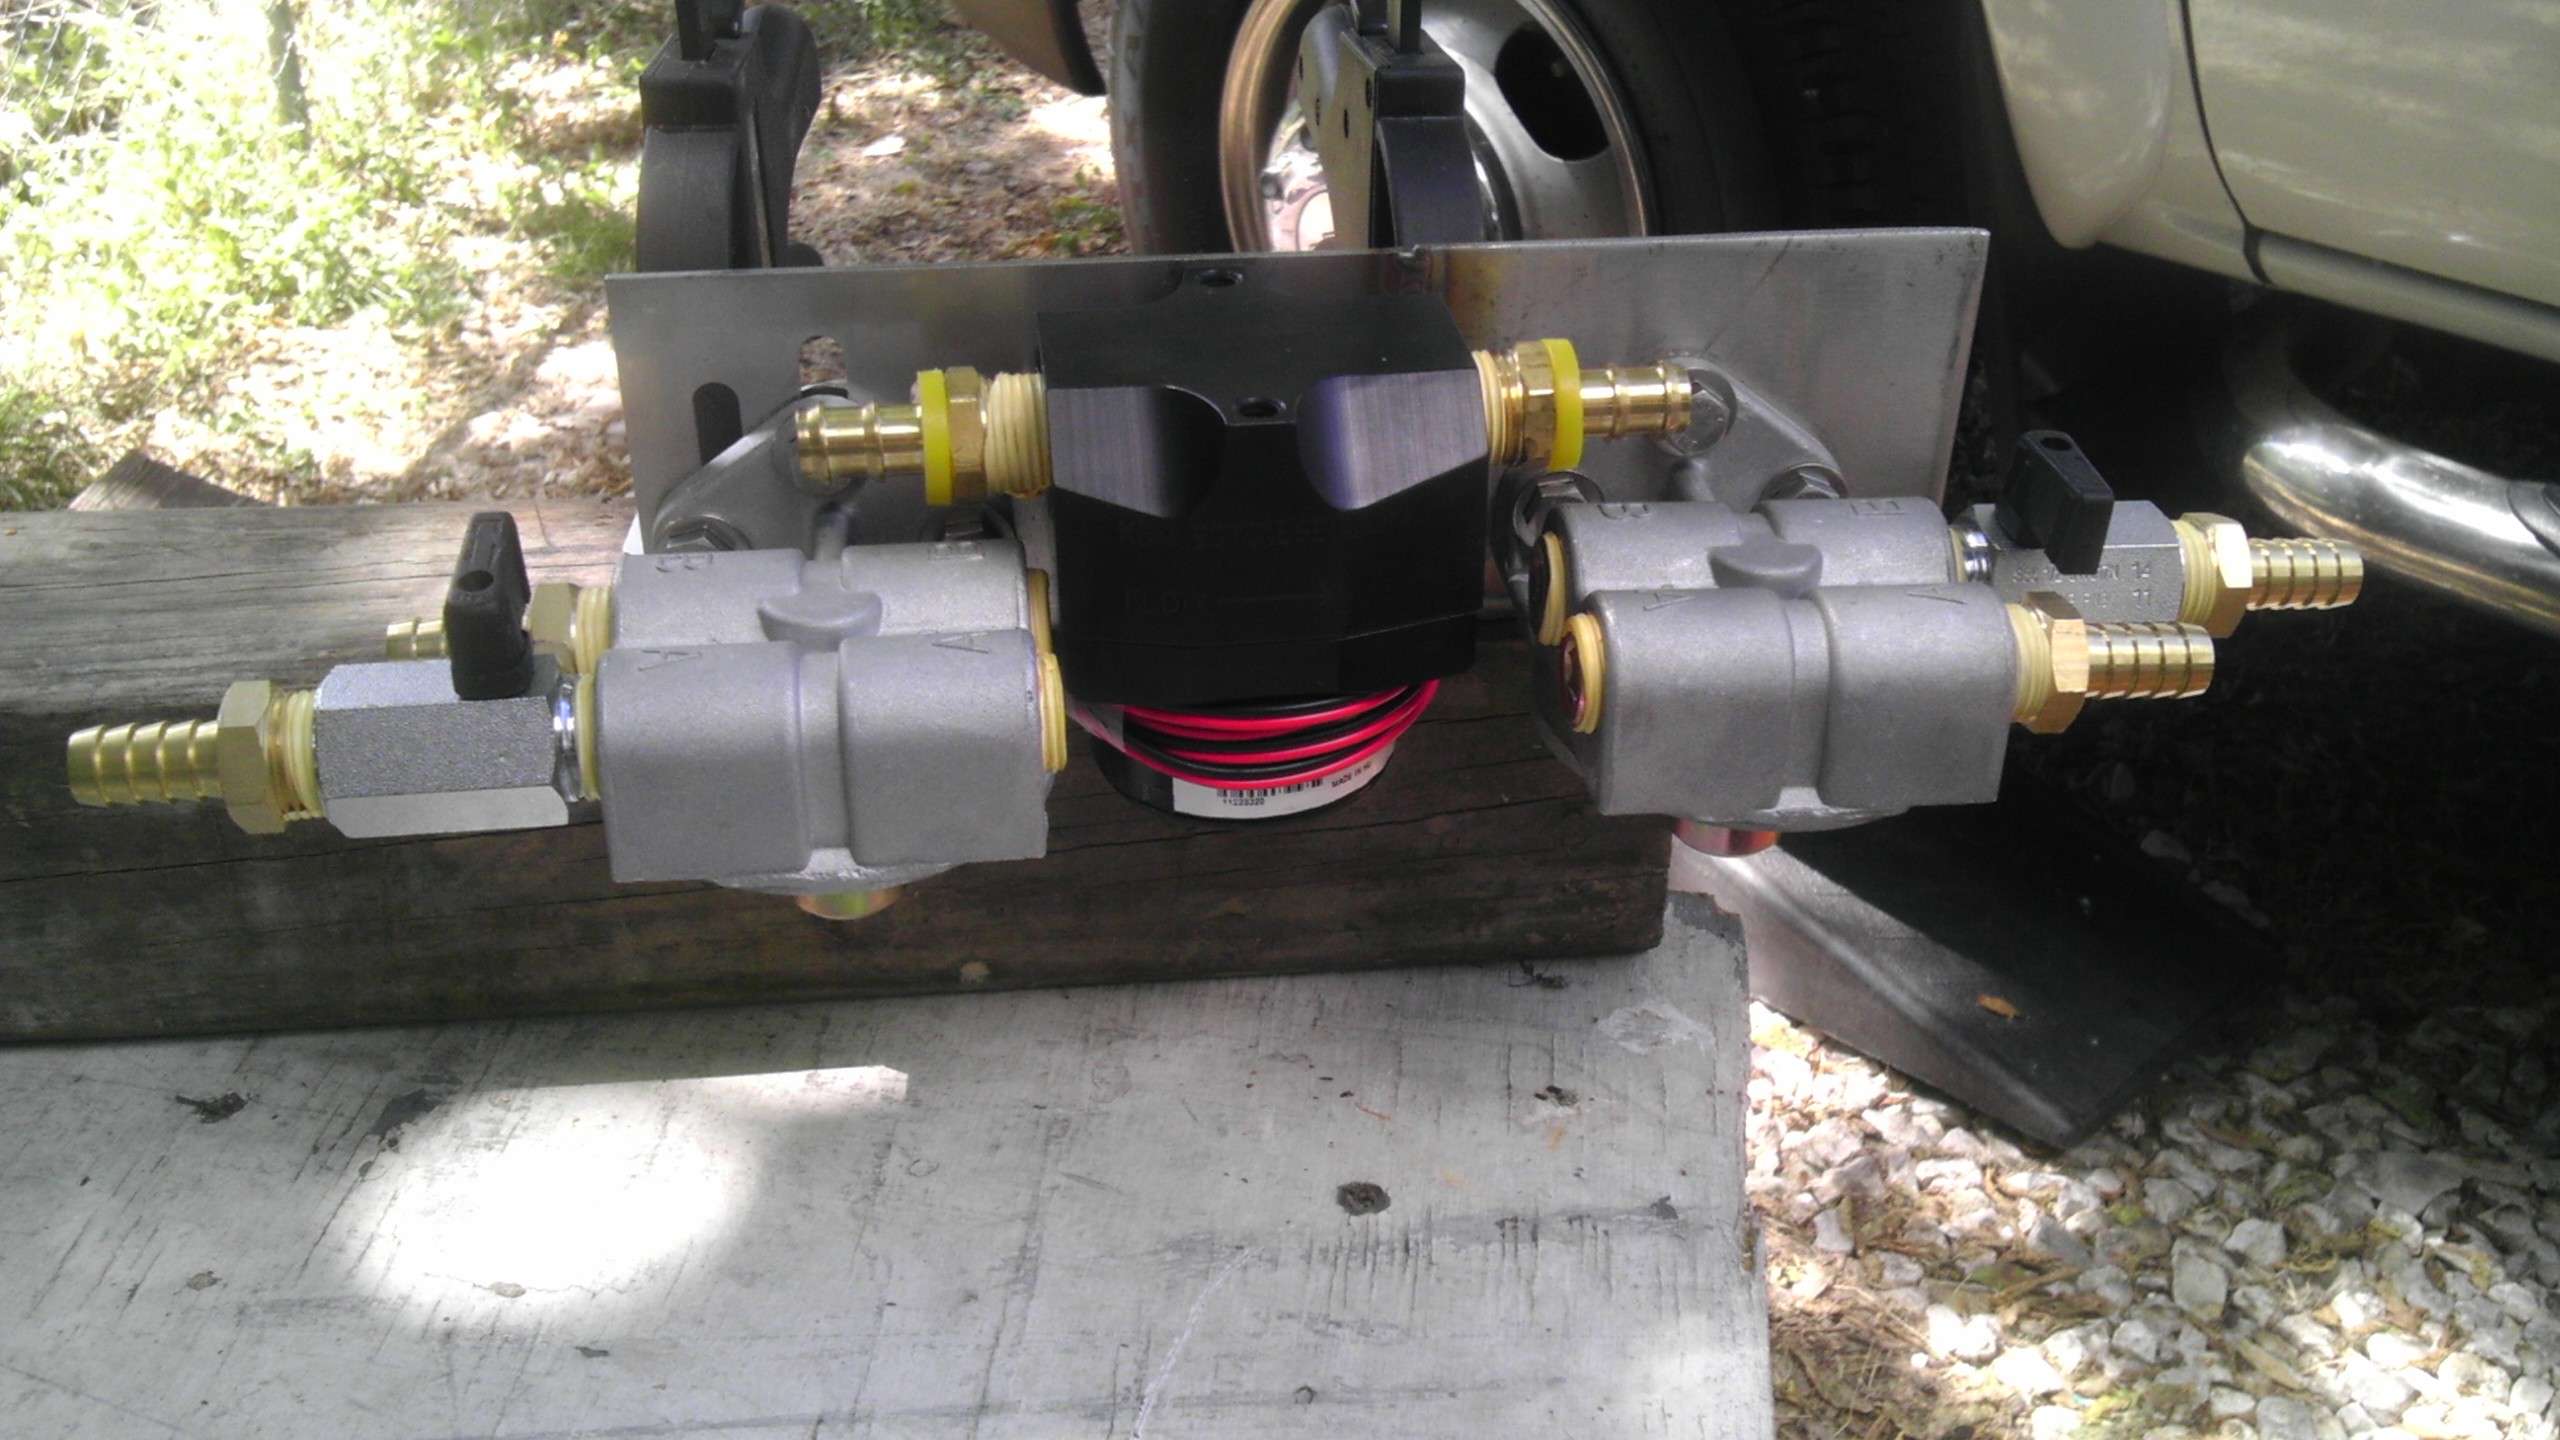
The KF33 is a side mount filter head with 4 ports; 2-inlets / 2-outlets, for either a straight thru plumb or in/out on the same side. Included are 2 plugs for the unused ports.
I added the mini-ball valves to the mix to aid with filter changes (less mess, less priming).
![Image]()
Here we have the rough mockup, using the yellow plumbers tape on all hose barbs, mini-valves, and plugs. Note the two ‘clamp-less’ hose barbs on the pump (yellow ring) which were included with the LP.
![Image]()
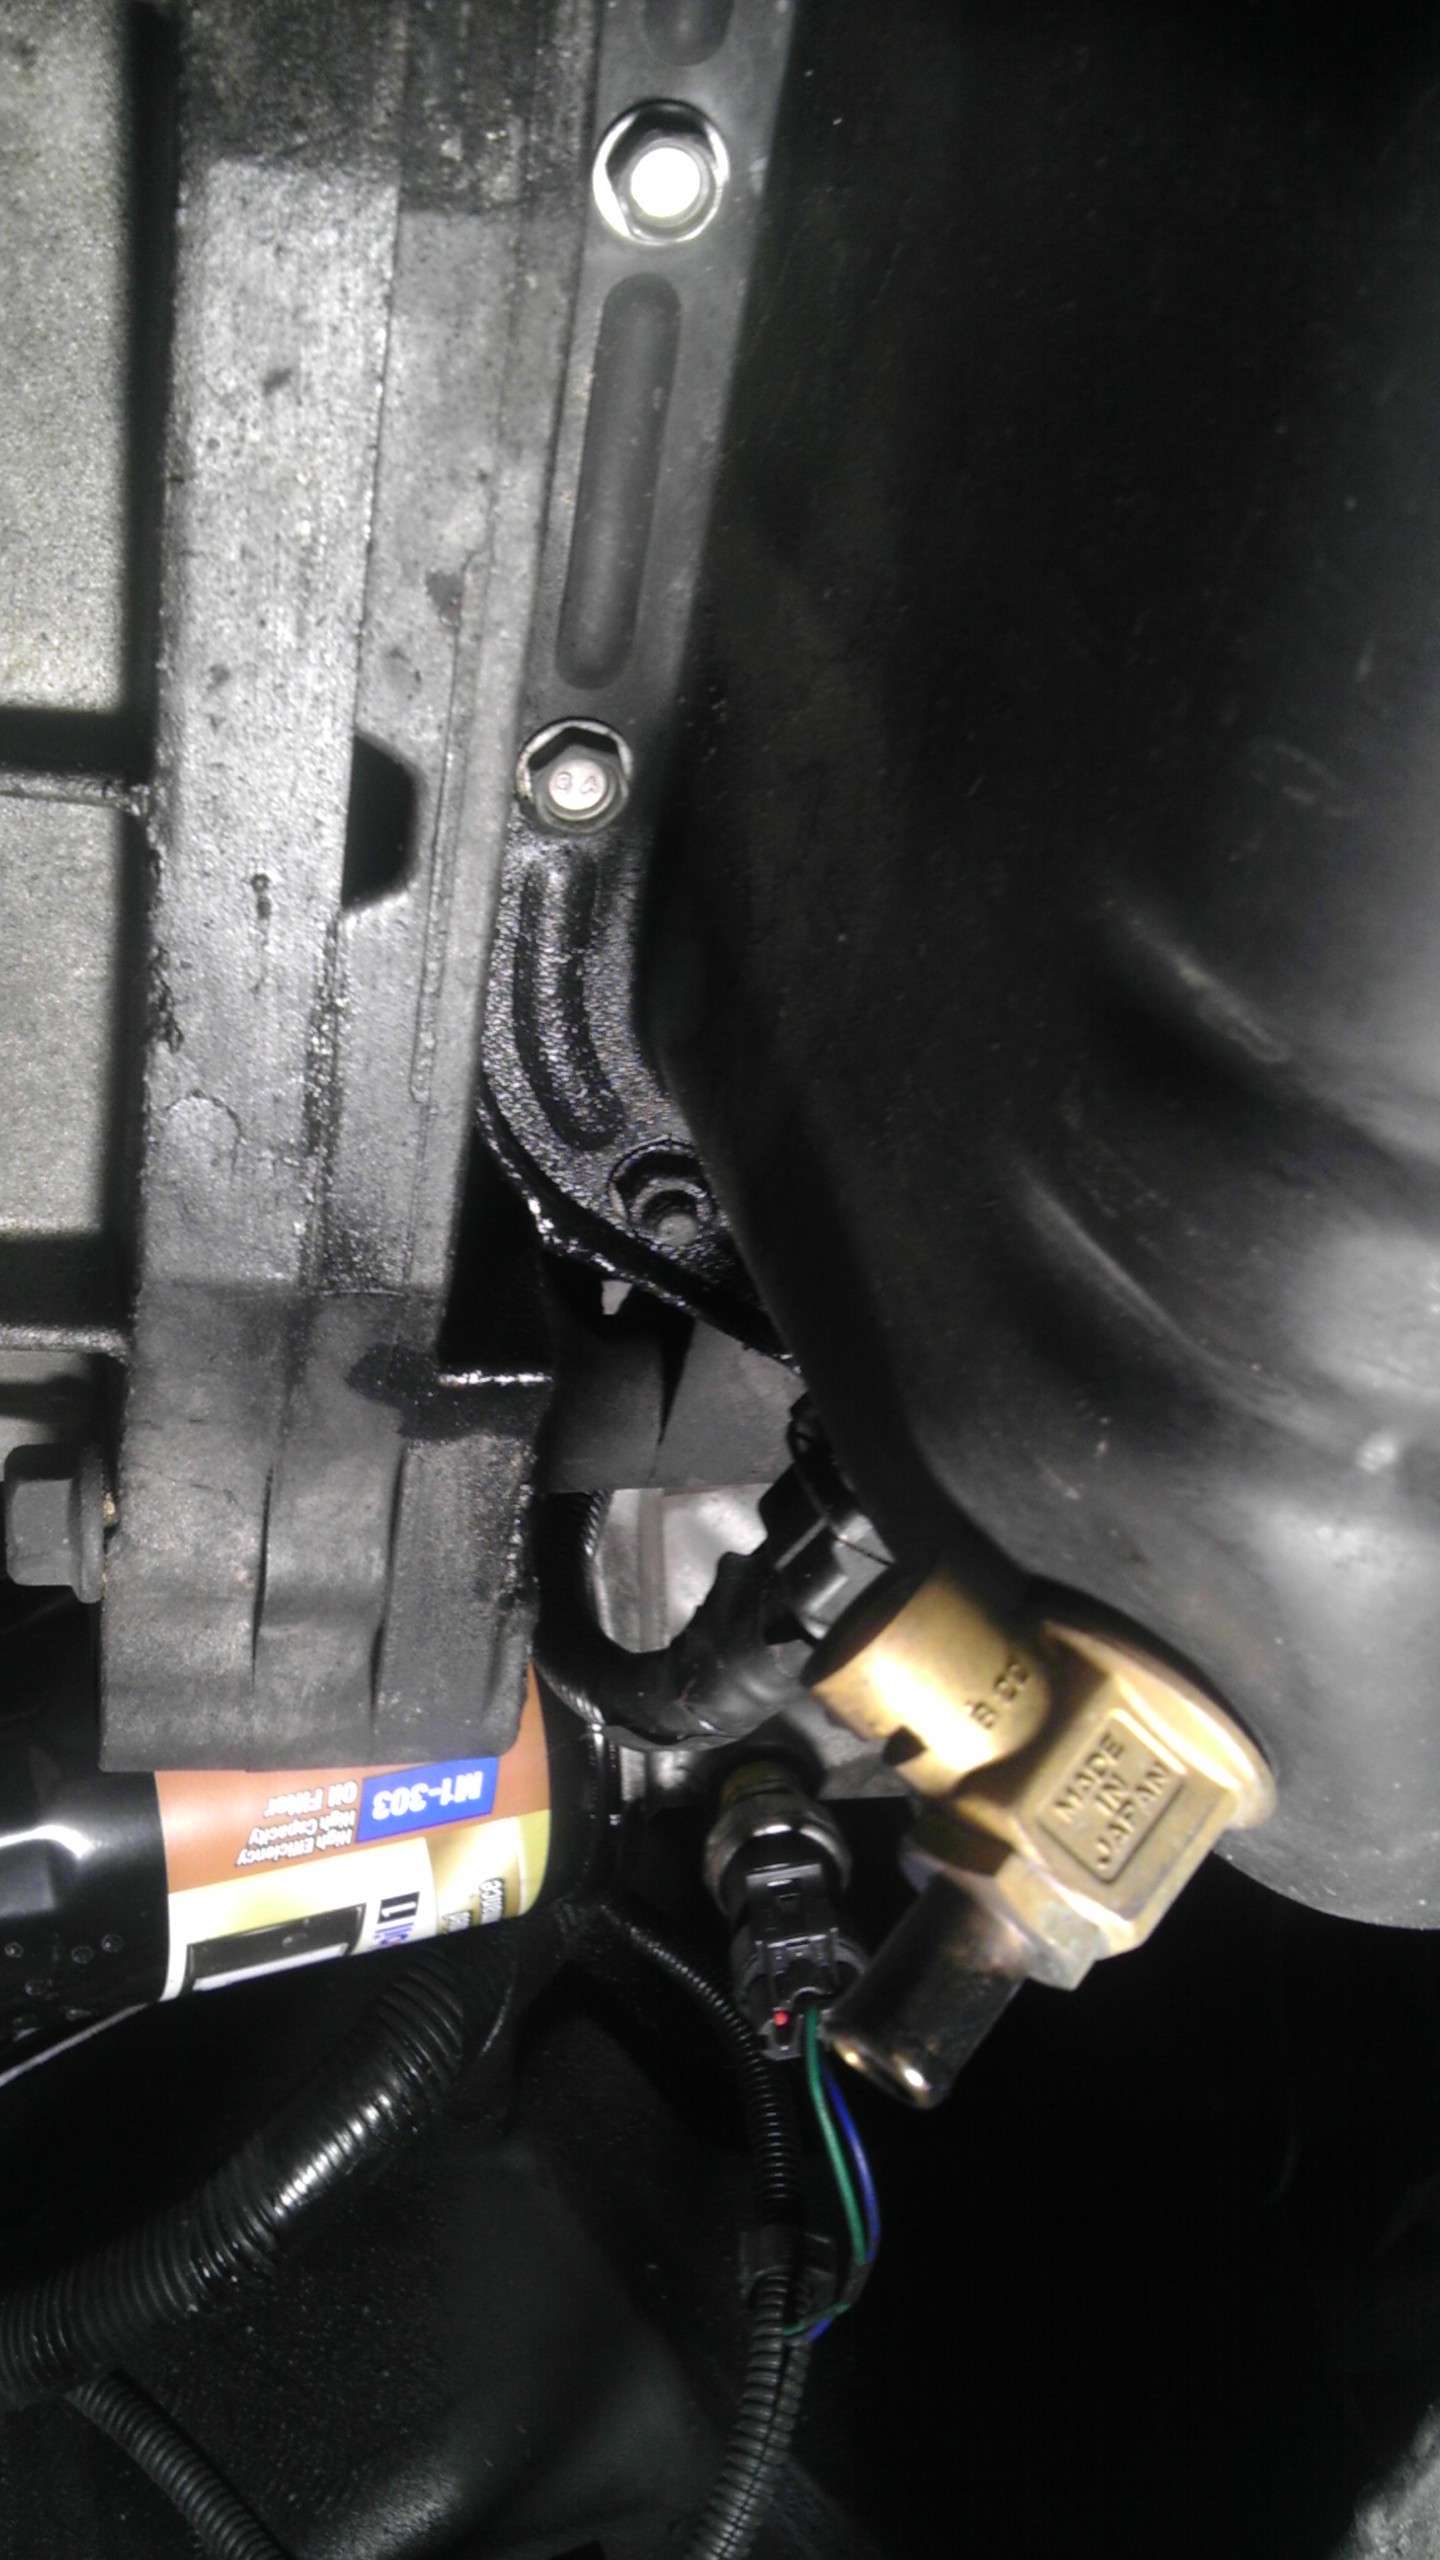
Now the hard part…removing the short flex fuel line that runs from the top of the fuel tank (sending unit), forward and down to the hard line, just behind the fuel cooler, in front of the fuel tank.
![Image]()
Blue arrow = Supply,
Red arrow = return line
![Image]()
You’ll need the Lisle Part # 37000 release tool to slip in and release these 4 tabs of the quick-connects on the hose ends of this supply line.
![Image]()
The one behind the cooler is MUCH easier, as you have better leverage to apply pressure. You don’t have to remove the cooler, just pull the 3 bolts and move forward for access room behind it.
It’s the other end that’s evil, up on top of the tank. Using drive on Ramps for the front and 3x stacks of 2x8s for the rear, I had plenty of room under the truck to work with (stock height DRW).
![Image]()
Some will find it’s easier to fight with this devil spawn hose connection by removing the bed for topside access. A DRW bed with a B&W hitch and a Roll-N-Lock cover….that wasn’t a viable option for me, my location, and available help or hoist.
Once this line is removed, you’ll be using the two black plastic quick-connect fittings (see 1st pic above) for the ½” bulk fuel line plumbed in; one at the tank sending unit -> filter/pump, and the other from the filter/pump -> back to the hard line connection, behind the fuel cooler.
In front, looking back, new supply line thru tank bracket, beside return line quick-connect.
![Image]()
![Image]()
-continued-
With this setup, I’m adding two aux filters, leaving the tertiary OEM mount up front, but you can easily scale it down to 1-aux FWS filter (BF-1212) and use your OEM filter head as the new Secondary fine particulate filter (using either the acDelco TP3018, or the Racor PFF50216 or the Baldwin BF46062).
You’ll have an easy access water drain valve and the best in fine particulate filtering up front.
Parts Goodies Used:
1- Kennedy single pump Deluxe Kit
2 – Hastings KF-33 aux filter head bases,
(also repackaged under either the Wix 24770 or the Napa 4770)
plus
1 – Baldwin BF1212 fws filter &
1 – Baldwin BF7633 filter
2 - MV08FM ½” mini-ball valves
4 – Brass ½” hose barbs
5 – Feet bulk ½” bio compatible fuel hose
(I used Aeroquip # FC332-08)
1 – Roll ‘Yellow’ (fuel compatible) plumbers tape
The Deluxe Kit comes with all the extras you see here;

On the left are the underhood power/fuse tap harness (pink/blue wires) and the Relay.
On the right is the LP harness,
The quick-connect water resistant plug tap (in plastic bag) for the LP wires,
And the oil PSI switch (green cap)with a ½” to ¼” brass bushing .
Center, two plastic quick-connect barbed fittings and two heavy duty hose clamps.
Not pictured but included, two ‘clampless’ ½” hose barbs, ‘bout 4-5’ of ½” fuel line.
The mounting plate for the LP is a nice Stainless Steel saddle style that sits on the frame rail top and secures thru an existing whole in the frame with a single SS bolt/lock nut (3 holes to choose from) to secure. It comes milled with 2 mounting slots, ready for the twin pump kit, but also works well for a single pump and a single aux filter head.
I modified it and added a 3rd position for a 2nd filter, and two drilled holes for the 1st filter head.

The KF33 is a side mount filter head with 4 ports; 2-inlets / 2-outlets, for either a straight thru plumb or in/out on the same side. Included are 2 plugs for the unused ports.
I added the mini-ball valves to the mix to aid with filter changes (less mess, less priming).

Here we have the rough mockup, using the yellow plumbers tape on all hose barbs, mini-valves, and plugs. Note the two ‘clamp-less’ hose barbs on the pump (yellow ring) which were included with the LP.
Now the hard part…removing the short flex fuel line that runs from the top of the fuel tank (sending unit), forward and down to the hard line, just behind the fuel cooler, in front of the fuel tank.

Blue arrow = Supply,
Red arrow = return line

You’ll need the Lisle Part # 37000 release tool to slip in and release these 4 tabs of the quick-connects on the hose ends of this supply line.

The one behind the cooler is MUCH easier, as you have better leverage to apply pressure. You don’t have to remove the cooler, just pull the 3 bolts and move forward for access room behind it.
It’s the other end that’s evil, up on top of the tank. Using drive on Ramps for the front and 3x stacks of 2x8s for the rear, I had plenty of room under the truck to work with (stock height DRW).

Some will find it’s easier to fight with this devil spawn hose connection by removing the bed for topside access. A DRW bed with a B&W hitch and a Roll-N-Lock cover….that wasn’t a viable option for me, my location, and available help or hoist.
Once this line is removed, you’ll be using the two black plastic quick-connect fittings (see 1st pic above) for the ½” bulk fuel line plumbed in; one at the tank sending unit -> filter/pump, and the other from the filter/pump -> back to the hard line connection, behind the fuel cooler.
In front, looking back, new supply line thru tank bracket, beside return line quick-connect.


-continued-