Write Up: LML EGR Delete
When doing the EGR delete you will either have to modify your stock up pipe (cut and weld), or buy a new up pipe (sold separately).
If you are installing an exhaust at the same time then this will be much easier. Installing a new down pipe is also a good idea while the old one is out.
![Image]()
![Image]()
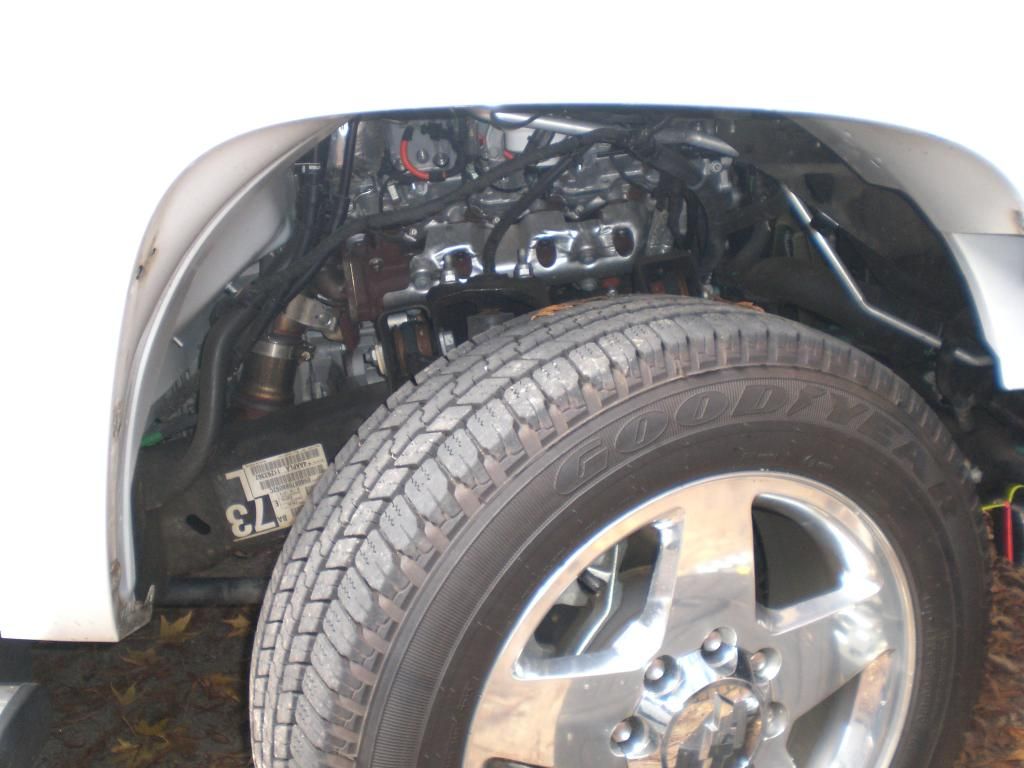
Step 1: Remove passenger side inner fender well. Turning the wheels to the left will allow more room for the install.
![Image]()
Step 2: Disconnect exhaust somewhere near the middle. This will allow you to slide the front pipe back enough for the down pipe to come out. If you are installing a new exhaust system, remove it completely.
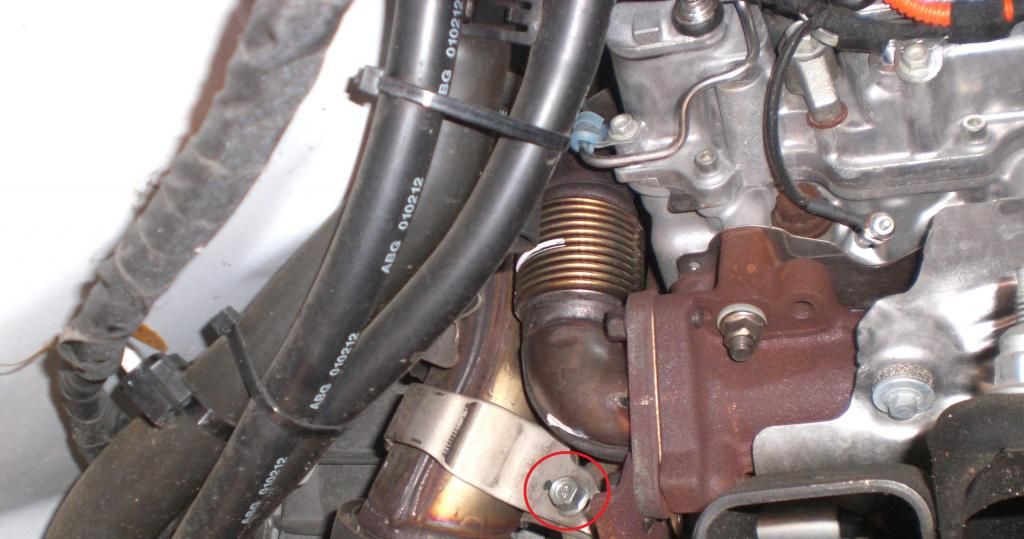
Step 3: To remove the front pipe, disconnect the V band clamp connecting it to the down pipe.
![Image]()
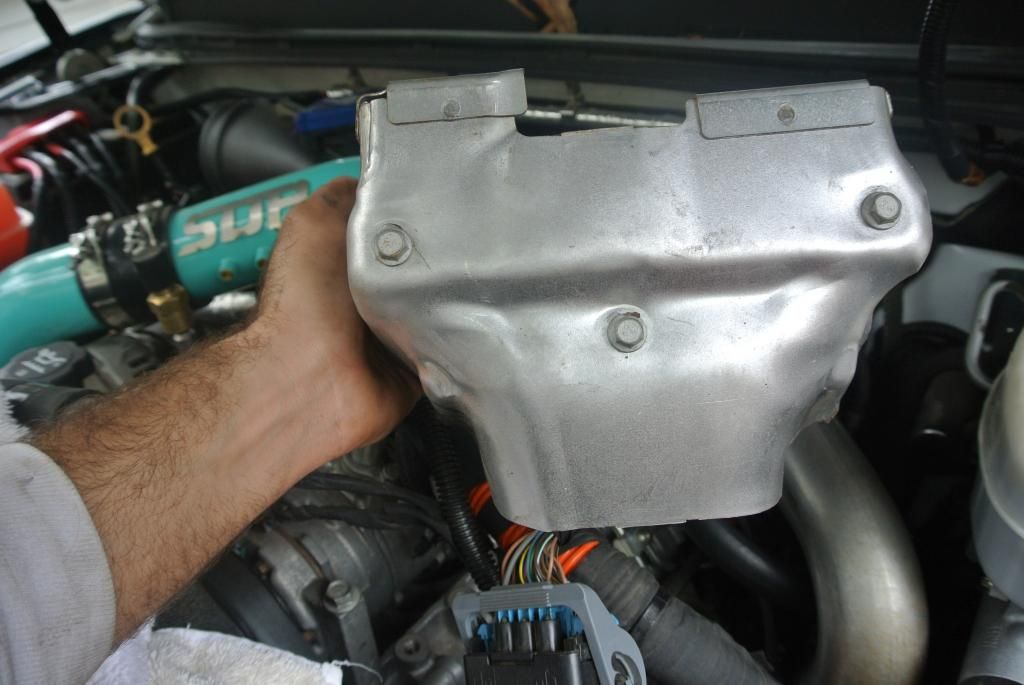
Step 4: working from the engine bay. Remove the plastic "6.6" intake resonator. 3 bolts hold this in place.
![Image]()
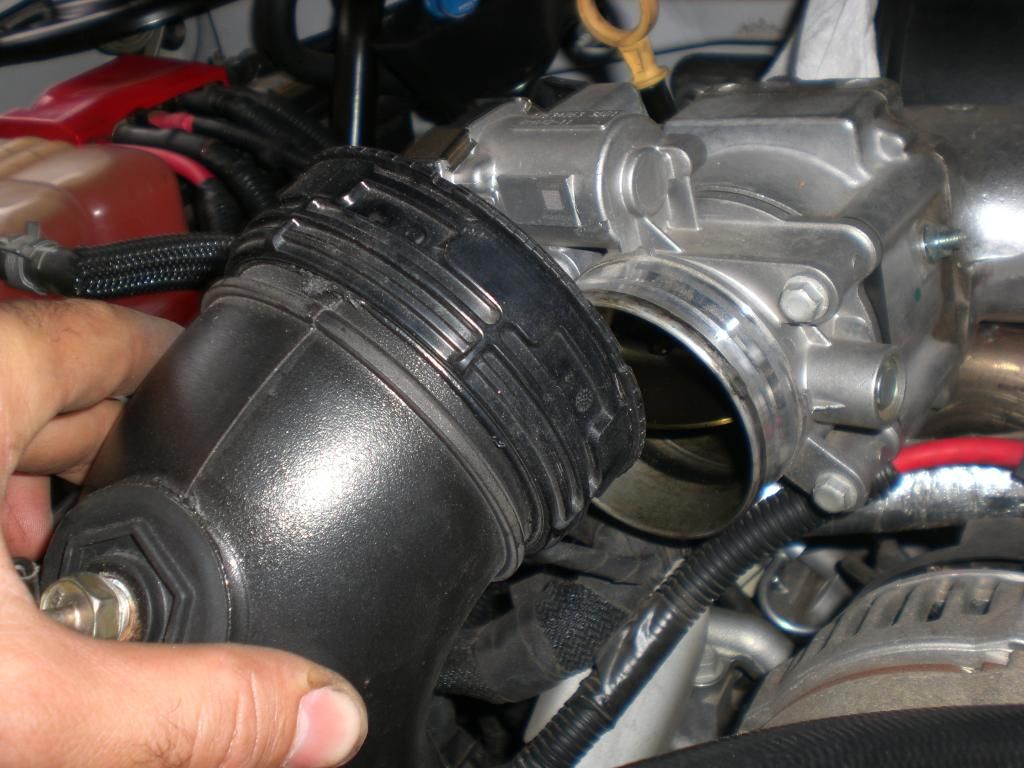
Step 5: Remove the air intake elbow with flat head screw driver.
![Image]()
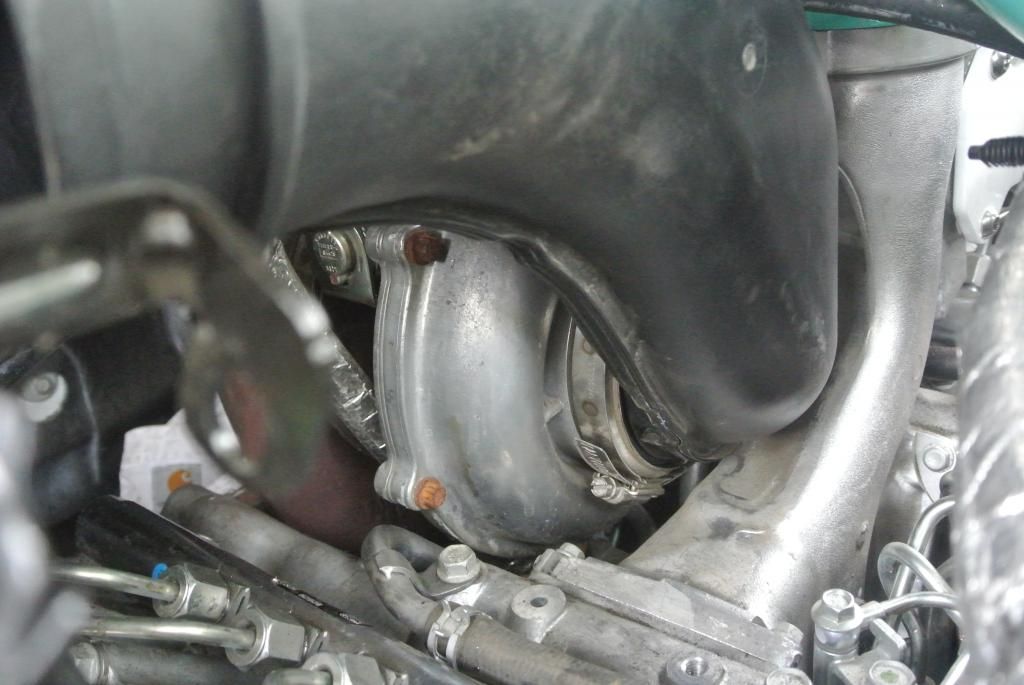
Step 6: Remove turbo heat shield. 3 bolts hold this piece on. Reinstallation is optional.
![Image]()
Step 7: Remove the silver "S pipe". 9 bolts hold this in place. Disconnect all sensors/plugs. Twist lock ring and pull out the "s pipe".
![Image]()
![Image]()
![Image]()
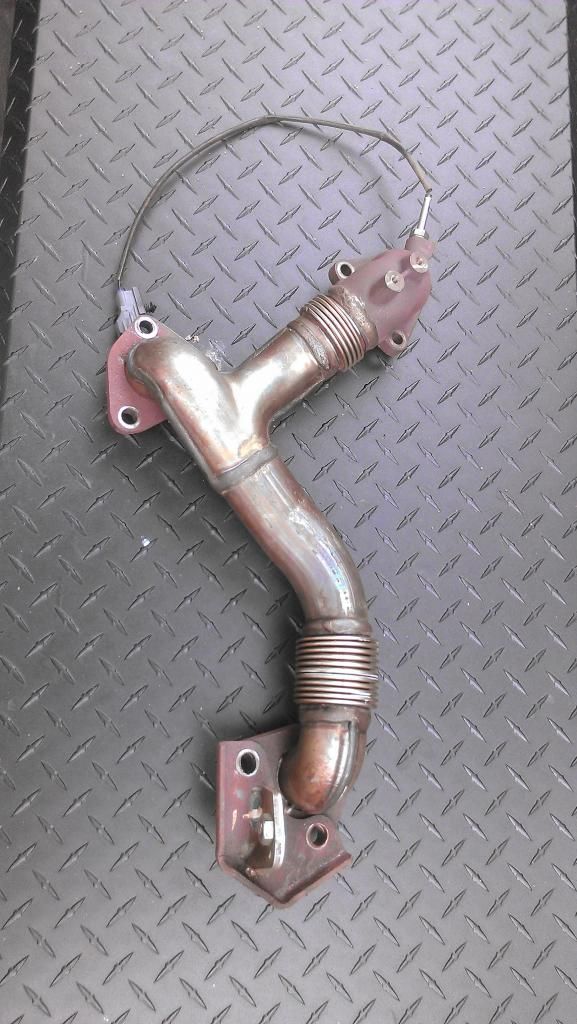
Step 8: Remove the EGR hot pipe. 4 bolts hold this on.
![Image]()
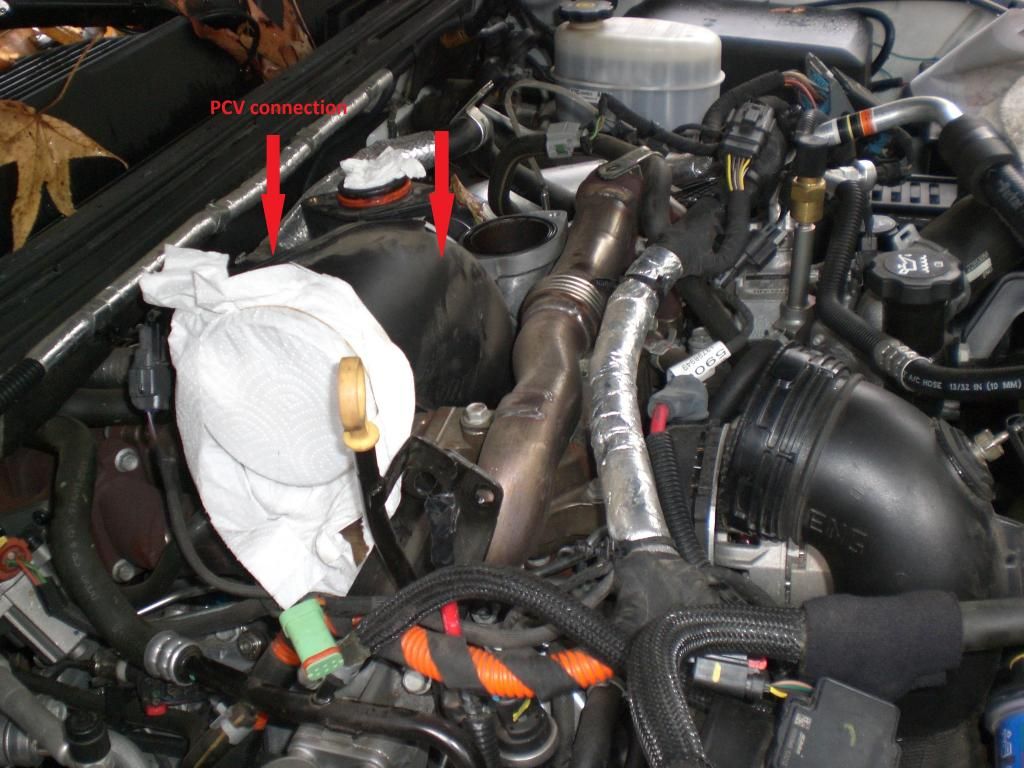
Step 9: Remove turbo inlet pipe and PCV connection on back.
![Image]()
![Image]()
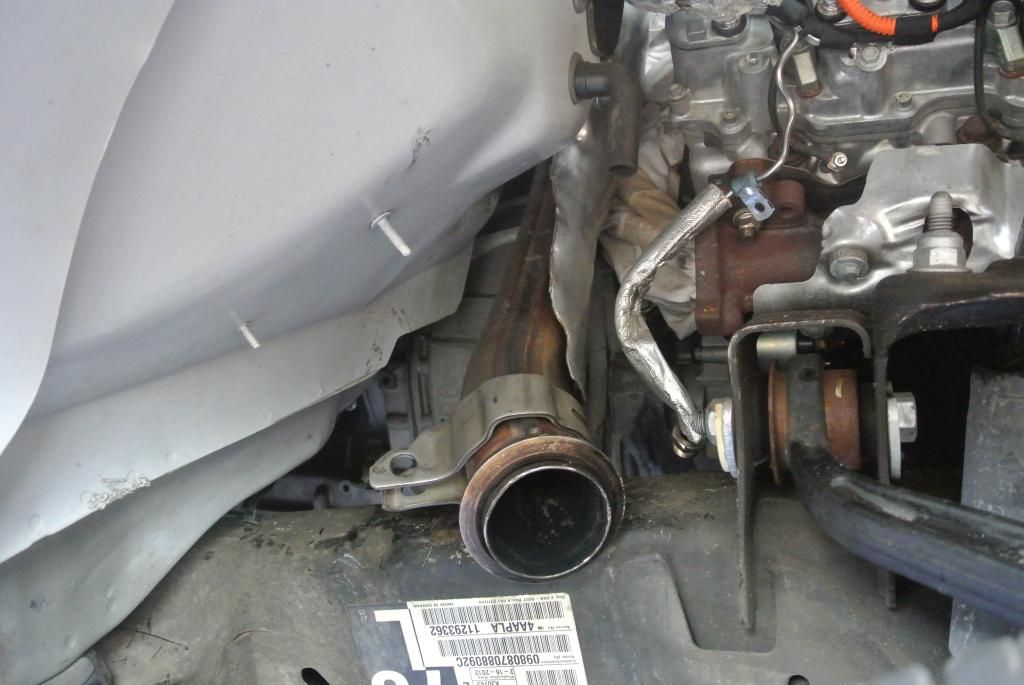
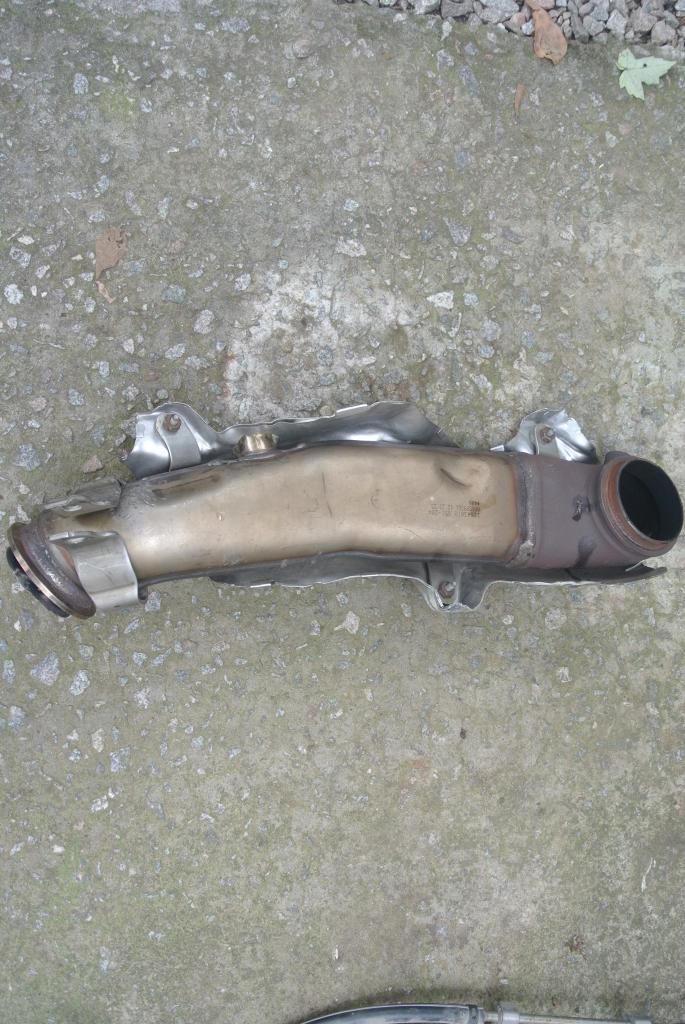
Step 10: Remove the down pipe. First, loosen the v-band clamp on the turbo side. The down pipe may still feel tight. Take a flat head and pry around the clamp. Remove the 3 sensors on the down pipe.
Step 11: Working from the wheel well, remove the down pipe bolt from the tab on the up pipe. Remove down pipe.
![Image]()
![Image]()
![Image]()
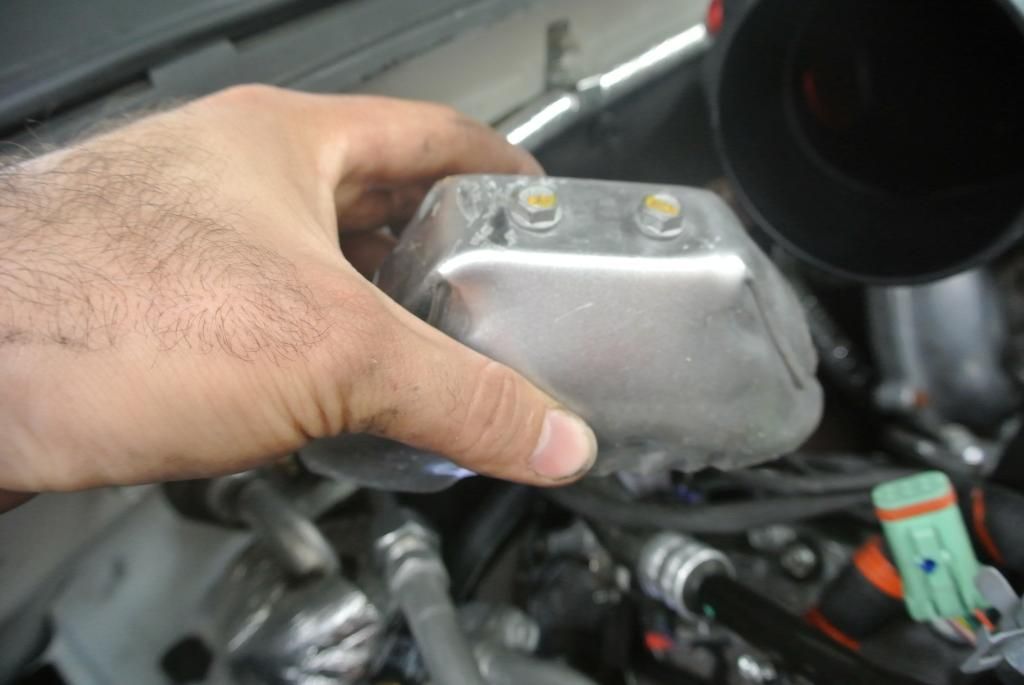
Step 12: Remove up pipe riser heat shield. 2 bolts hold this on.
![Image]()
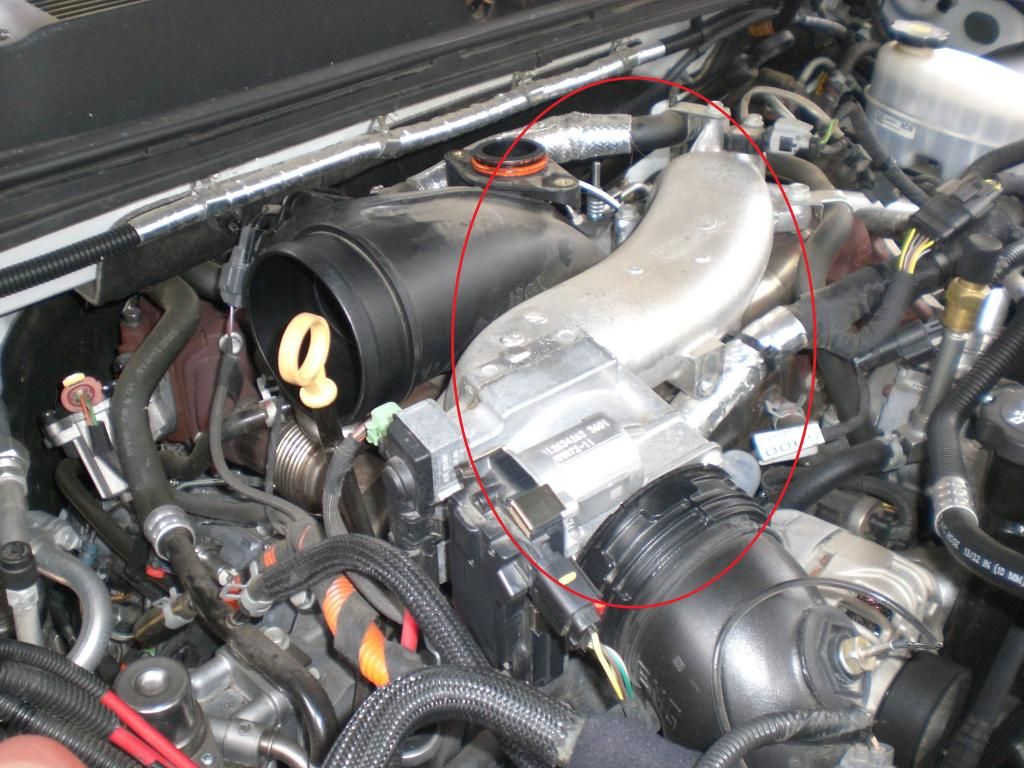
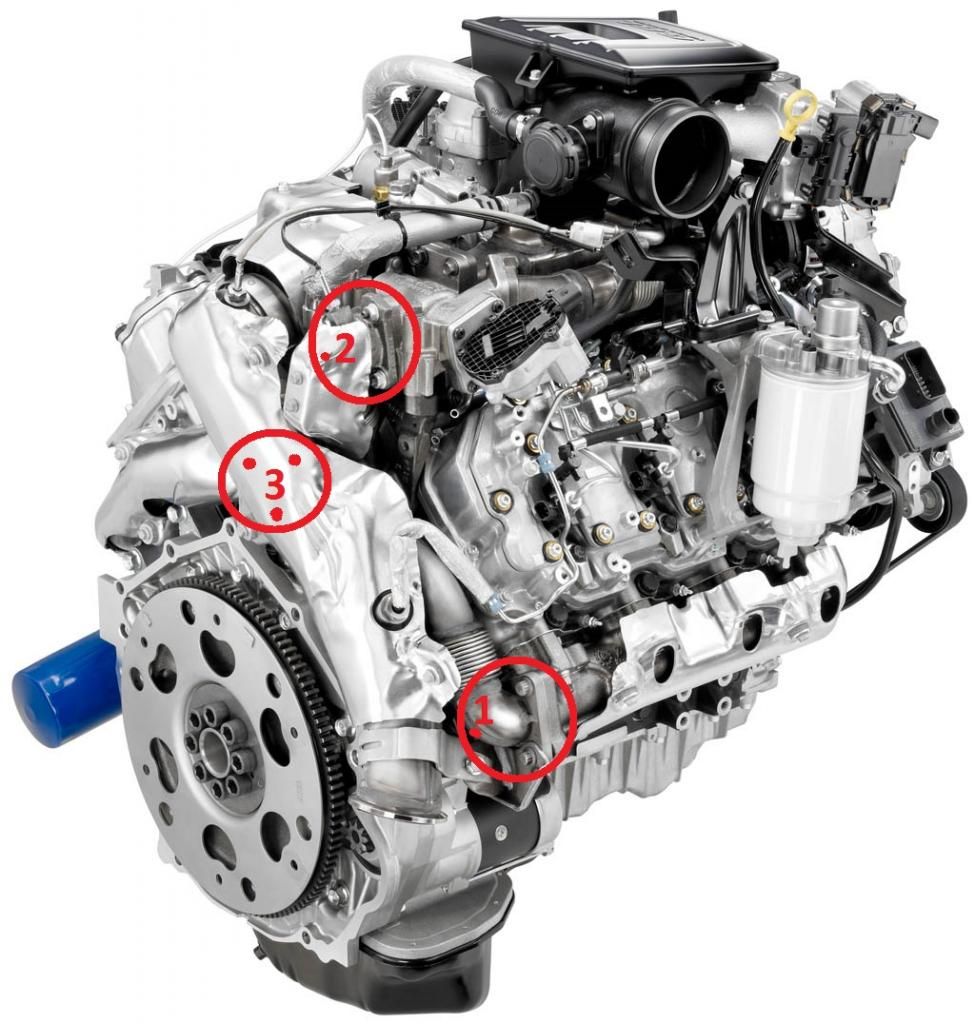
Step 13: Removing the Up Pipe. This is the hardest part of the delete, so make sure you have a good breaker bar and impact sockets. You will need a 12mm 12 point socket to remove the 9 bolts that hold the factory up pipe in place.
I've high lighted the 3 areas where the bolts are. Each section has 3 bolts holding the up pipe in place. Imagine the down pipe and riser heat shield removed. The bolts are behind those...
![Image]()
Step 14: Start by removing the 3 bolts on the exhaust manifold. Section 1. Keep gasket.
![Image]()
Step 15: Next, remove the 3 bolts that connect the riser to the EGR. These can be accessed from underneath. Section 2. The gasket and bolts will not be re used.
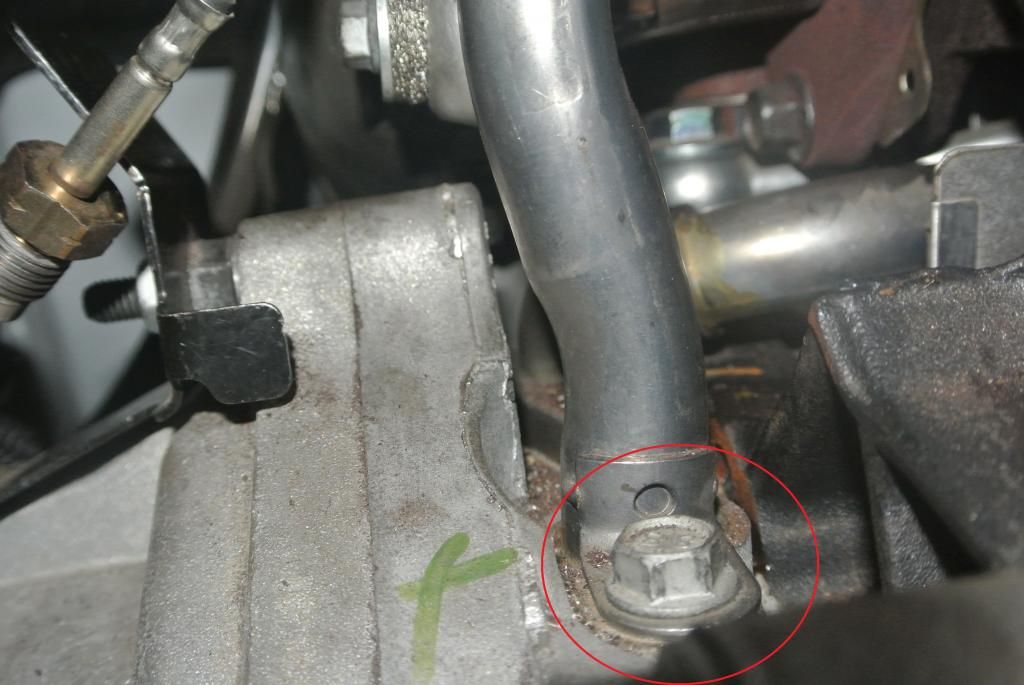
Step 16: The last 3 are the hardest to remove (section 3). You won't be able to see much so most of it will be by feel. You'll notice a metal coolant line in front of one of the bolts...the hose will have to be loosened and pushed aside to access the bolt. Loosen the one bolt and push to the side.
![Image]()
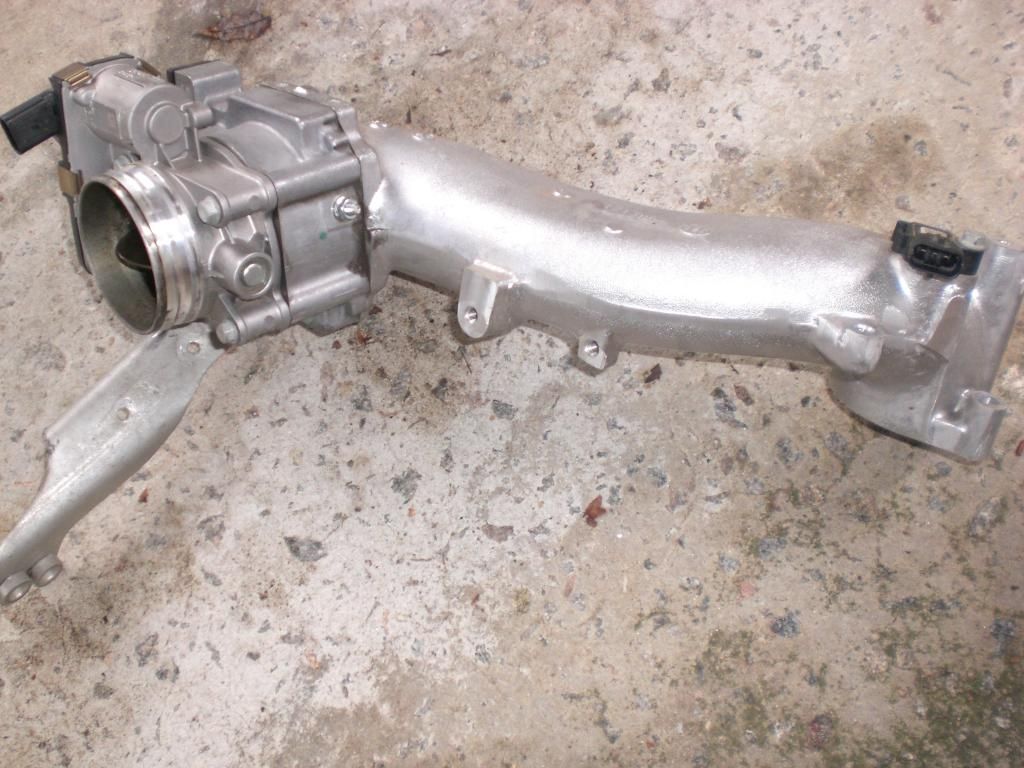
Step 17: Remove all 3 bolts from section 3. Unplug the sensor from the riser section. Remove the up pipe.
![Image]()
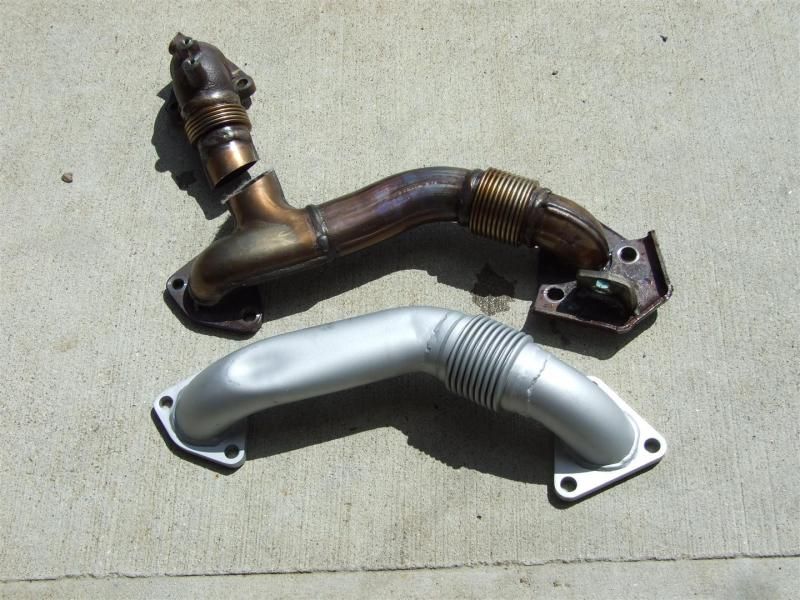
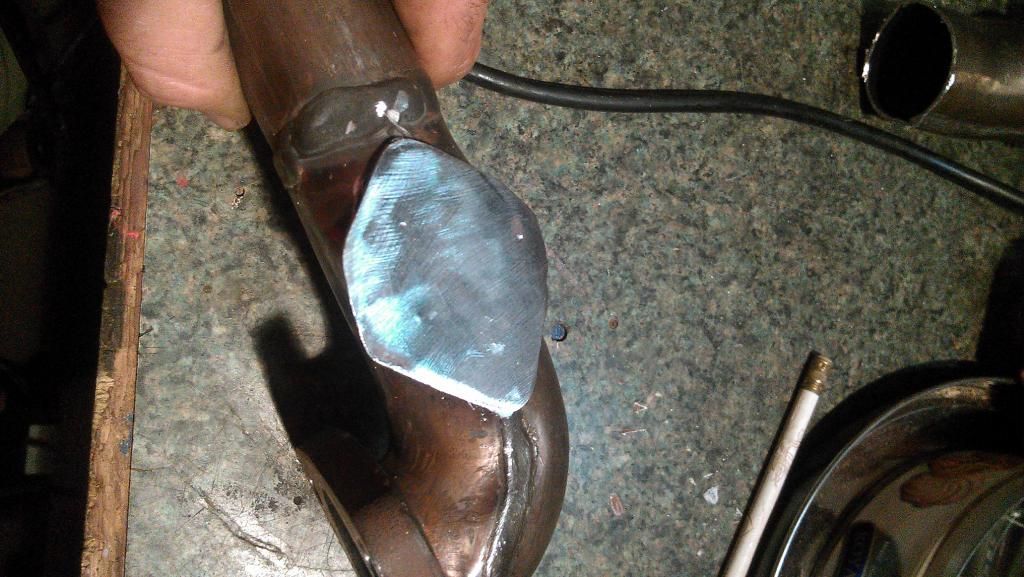
Step 18: If you bought a new up pipe or are using a lb7 pipe then skip this step. Cut the riser section off the up pipe. Using a piece of metal weld the hole shut.
![Image]()
![Image]()
When doing the EGR delete you will either have to modify your stock up pipe (cut and weld), or buy a new up pipe (sold separately).
If you are installing an exhaust at the same time then this will be much easier. Installing a new down pipe is also a good idea while the old one is out.

Step 1: Remove passenger side inner fender well. Turning the wheels to the left will allow more room for the install.
Step 2: Disconnect exhaust somewhere near the middle. This will allow you to slide the front pipe back enough for the down pipe to come out. If you are installing a new exhaust system, remove it completely.
Step 3: To remove the front pipe, disconnect the V band clamp connecting it to the down pipe.

Step 4: working from the engine bay. Remove the plastic "6.6" intake resonator. 3 bolts hold this in place.

Step 5: Remove the air intake elbow with flat head screw driver.

Step 6: Remove turbo heat shield. 3 bolts hold this piece on. Reinstallation is optional.
Step 7: Remove the silver "S pipe". 9 bolts hold this in place. Disconnect all sensors/plugs. Twist lock ring and pull out the "s pipe".
Step 8: Remove the EGR hot pipe. 4 bolts hold this on.

Step 9: Remove turbo inlet pipe and PCV connection on back.
Step 10: Remove the down pipe. First, loosen the v-band clamp on the turbo side. The down pipe may still feel tight. Take a flat head and pry around the clamp. Remove the 3 sensors on the down pipe.
Step 11: Working from the wheel well, remove the down pipe bolt from the tab on the up pipe. Remove down pipe.
Step 12: Remove up pipe riser heat shield. 2 bolts hold this on.
Step 13: Removing the Up Pipe. This is the hardest part of the delete, so make sure you have a good breaker bar and impact sockets. You will need a 12mm 12 point socket to remove the 9 bolts that hold the factory up pipe in place.
I've high lighted the 3 areas where the bolts are. Each section has 3 bolts holding the up pipe in place. Imagine the down pipe and riser heat shield removed. The bolts are behind those...
Step 14: Start by removing the 3 bolts on the exhaust manifold. Section 1. Keep gasket.

Step 15: Next, remove the 3 bolts that connect the riser to the EGR. These can be accessed from underneath. Section 2. The gasket and bolts will not be re used.
Step 16: The last 3 are the hardest to remove (section 3). You won't be able to see much so most of it will be by feel. You'll notice a metal coolant line in front of one of the bolts...the hose will have to be loosened and pushed aside to access the bolt. Loosen the one bolt and push to the side.
Step 17: Remove all 3 bolts from section 3. Unplug the sensor from the riser section. Remove the up pipe.
Step 18: If you bought a new up pipe or are using a lb7 pipe then skip this step. Cut the riser section off the up pipe. Using a piece of metal weld the hole shut.